No need to stress about hiring professional painters if your ceiling requires a fresher layer of paint. You can accomplish the task within a day just with adequate paint and a few tools.
This article will explore how you can paint a ceiling even without painting expertise for the best results. But first, these are the supplies you need to get down to work;
- Paintbrush
- Rolling spinner
- Paint roller
- Extension pole for your paint roller
- Painter's tape
- Interior latex paint primer
- Interior latex paint or ceiling paint
- Stepladder
- Roller tray
- Canvas drop cloth
- Safety glasses and a baseball cap to protect yourself against paint drips
- Drywall sanding paper
The following are the steps to paint a ceiling like the pros.
Step 1. Clear the Room
The first thing you want to do when you get all your supplies is clear the room of as much furniture and decor as you can. You need a lot of space to move around with your stepladder or enough space to walk on as you paint.
Step 2. Mask bulky Furniture and Floors with Canvas Drop Cloths
After removing most furniture, some bulky ones, like couches, can be too cumbersome to clear. For these, use a canvas drop cloth to cover them to prevent paint splatters. Additionally, use the canvas drop cloth to cover the floor if you are not changing the flooring.
Step 3. Mask Walls with the Painter’s Tape
This step is only necessary when you are only painting the ceiling. Mask the areas where the wall meets the ceiling to prevent damaging your wall paint.
You can also use the painter's tape to cover decorations and crown molding on the ceiling that you don't want to cover with paint.
Step 4. Sand Ceiling
It would be best to sand the ceiling to remove any bumps or crud that could have accumulated over time. This step is vital if your ceiling is untextured because you want it to remain smooth after painting it. Sanding also guarantees faster paint bonding. Attach your sanding pole to the extension pole so you can stand without the step ladder.
Step 5. Prime the Ceiling Before Painting
This step is vital because you want to prevent stains and use less paint. It is best to pick the right stain-blocking primer for the texture of your ceiling. For instance, you can use a high-build primer for textured ceilings that will prime and cover imperfections. If you have a smooth or very lightly textured ceiling, you can use an interior latex drywall primer that resembles the colors of the paints you will use.
Attach your paint roller to the extension pole so you can apply the primer without a ladder. It is best to apply an interior latex stain-blocking paint primer for this step, applying one coat at a time using the roller. Give the primer enough time to dry before proceeding to the next step. You can read the manufacturer's manual to know how long to wait.
Step 6. Cut in Before You Roll
Once your primer is dry, you can switch to applying your paint. Use high-viscosity interior latex wall paint or ceiling paint for this step. To make sure you have the right paint, you can check the manufacturer label's measurement; high-viscosity is measured in Krebs Units (KU) and is considered to be 106 KU or higher. This measurement shows the paint is thick enough to stay on the ceiling until it dries.
To cut in, you need to paint a 2" to 3" cut line along the ceiling's edge. Use a stepladder and a 2-inch trim brush and start in a corner until you've covered all edges.
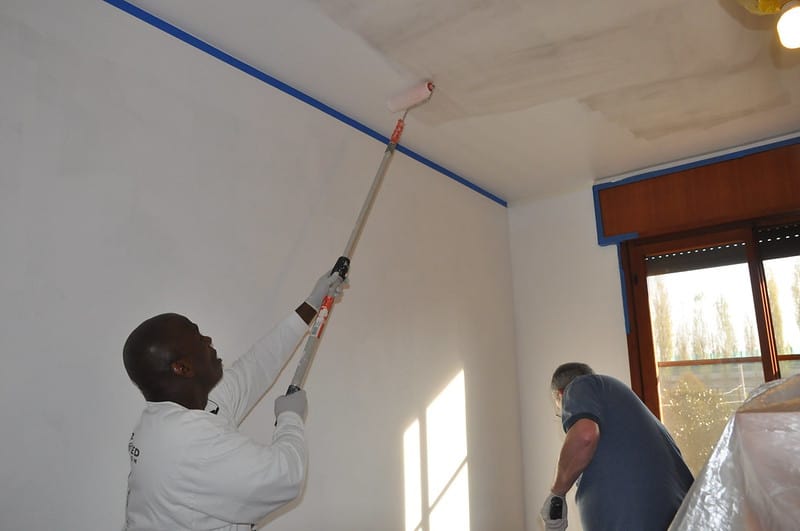
Step 7. Paint the Ceiling Wile Cut Lines are Still Wet
In this step, you will use your roller to paint the ceiling as soon as you paint the cut lines. It will help reduce brush marks or lap marks if you use a roller before the cut lines dry. It is also ideal that the paint dries at the same time.
Pour the paint into the roller tray's deep end and run the roller in it until the nap is fully covered in paint. Attach the extension pole to the roller so you can use it easily. When painting a ceiling, it is vital to keep your hands lower than your heart level to minimize fatigue, which is why you need to use an extension pole.
Once your painting apparatus is ready, start painting the ceiling in controlled back and forth strokes along the ceiling to avoid leaving paint lines or roller marks. It is best to tackle small sections as you paint to track where you need to cover paint lines. When you apply all the paint on your roller's nap, run it on the roller tray again and continue painting until you cover the whole ceiling.
Step 8. Apply a Second Coat if necessary
After your first coat dries, you will be able to see how the paint performed. If you feel you need to add a second coat, you should repeat the process from applying another coat of cut-lines and then painting the ceiling with the roller.
When done with the last coat, leave the paint to dry according to the manufacture's guide.
Step 9. Clean The Painting Brushes and Tools
When done painting a ceiling, you need to clean your tools to keep them in good shape for the next project. Using a bucket with soapy water, clean your paintbrushes and paint tray. Also, remove the roller cover from the roller frame and handwash it in soapy water to remove all pain. When done with the soapy water, rinse them with clean water and leave them to dry.
Conclusion
If you wondered how to paint a ceiling before, worry no more as the tips shared in this article require the minor painting skills you have.
To finish the project without too much fatigue, it is best to prepare the room beforehand, removing any furniture that can be removed and covering the rest with the canvas drop cloths. Also, a long extension pole will ensure your hands stay relaxed rather than raised, which would leave your body aching with fatigue.