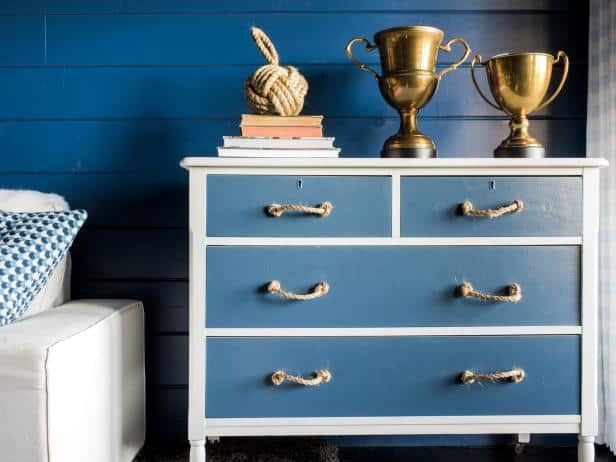
Like every other painted furniture, the paint wears off with use. It might take a few years for the paint to wear off, but it happens. When this happens, you have multiple options on hand. One of them is giving it a dresser makeover. And part of how you can do that is using paint. So let's find out how to paint a dresser in the sections below.
Why Should I Paint My Dresser?
Painting furniture is a great way to flip them. A dresser is no different. Every few years, you can select different colors to paint your dresser. This can go a prolonged way in making your space look fancy every few years. Who doesn't want that? Not to mention furniture makeovers can be fun DIY projects.
Additionally, with time, paint starts to wear off. Especially on the corners and places the dresser sees the most use. This can include the dresser drawers and the dresser top. Painting a dresser takes time because you have to be very careful. However, a newly painted dresser looks very beautiful even in a small house.
A dresser makeover can also correct any other imperfections on the dresser, such as deep scratches and rough edges. Additionally, it can help to fix furniture you found at a thrift store that has the potential to look beautiful. Let's look at some of the methods used to paint a dresser and how to go about painting a dresser.
How To Paint a Dresser
Before you pick up a paint brush, you should know that not all dressers fit the characteristics of a good candidate. Ensure that the dresser you want to refurbish will make it through the process. Very old furniture and other weak wood types might not make it. So before any prep work, ensure to evaluate the dresser.
a) Step 1
Remove the drawers. A major mistake people make is forgetting to take any drawer components out before starting the makeover process. If you have already started without removing the drawers, you can carefully pry them out with a chisel. By this time, you should have already selected your furniture paint.
b) Step 2
Using a sanding block or sandpaper, lightly sand the entire surface of the dresser. Ensure to also sand the drawers you removed before starting. It is not recommended to skip sanding because sanding creates a blank canvas you can work on. Furthermore, sanding removes any remaining finishing and paint.
c) Step 3
After the sanding is done, there will be dust on the dresser. So you want a smooth surface to apply paint on; otherwise, the surface will be bumpy. So get to cleaning any dust or shavings on the dresser. Ensure every last bit of dust is off the dresser to ensure a beautiful finish. You can use a damp cloth to do this. However, it has to be lint-free cloth.
If there are any unnatural stains on the wood, you can mix equal parts of vinegar and water. This will get the stains right off. Allow the dresser a few hours to ensure any dampness completely dries off.
d) Step 4
This is where you start painting. However, if there are any parts of the dresser you don't want to be painted, cover them with painter's tape. Then, the first coat goes on. After that, you can use a roller or a brush. However, a brush is recommended because it is easier to control your brush strokes. A roller, on the other hand, won't leave any visible brush strokes.
Let the first coat dry before applying any other coats. However, ensure to apply at least two coats. Each coat should dry thoroughly before you put on another coat. Make sure not to forget the drawer fronts. You can also paint inside the drawers for a uniform look. You can use both a roller and a brush to complete the paintwork.
Furthermore, if you don't want the paint to go everywhere, you can lay down some plastic, an old shower curtain, or an old bedsheet. Paint drips so the plastic will catch any drips.
e) Step 5
After at least 48-hours, you can commence with the final coating. After layering the protective finish, let it dry again in the open air. Keep in mind you are working with volatile organic compounds, and inhaling them could cause you to feel dizzy or faint. Therefore, it is also recommended that you work in a well-ventilated area.
f) Step 6
This step includes buffing a wax finish all over your work. If you use oil-based paints, then you won't need to do the procedure. However, if you use chalk paint, then a wax finish will keep the paint looking fresh for a long time. Select the type of wax finish that you want, and then you can begin.
After you make your selection between dark wax and light wax, start buffing; using a rag, buff the wax carefully over the whole dresser. Focus the wax mostly on the edges of the dresser. This is where paint wears out the most for some reason. Again, don't forget the drawers. Allow the wax to dry for a durable finish.
g) Step 7
The last step includes putting the drawers back. You can add a little spice to the drawers by adding custom drawer pulls. This will give your dresser the look you like. After letting everything dry completely, your painted piece is now ready for use. To make the drawers slide in and out easily, apply wax to the insides of their rails as well.
This will give you drawers that pull out easily. They won' get stuck. If you apply wax to them, you won't hear any squeaky sounds when opening or shutting the drawer.
What Makes Your Dresser A Good Candidate For Refurbishing?
If you want to avoid the biggest mistakes, ensure to follow these steps before trying to refurbish your old dresser or the dresser you got from a yard sale. Making these mistakes could permanently damage the wood and render your furniture useless.
1) Material
Most furniture is made from wood. However, not all materials that make furniture is wood. It is preferable to work with real wood because it is easier to sand and paint. On the one hand, other materials such as Formica or veneer are also acceptable. On the other hand, however, it takes very long to prep them.
Materials such as plastic or pressed wood also make good candidates for refurbishing. However, their prep time takes longer, and you might or might not get a smooth finish. But with the right process, you will.
2) Condition
The condition you receive the dresser in matters a great deal. Some of the things you want to look out for include very deep grooves, scratches, and dents. You also want to look out for loose legs on the piece of furniture. With dents and scratches you can use wood filler.
Additionally, missing pieces and a bad or weird smell coming from the furniture should not be acceptable. Be very careful with weird smells coming from furniture. You might never be able to get the smell out, no matter how much vinegar or varnish you use. Finally, the piece of furniture should be structurally sound.
3) Value
One of the things that most painters or woodworkers know is not to paint an antique piece of furniture. This is because it will be ruined. So before you get great pieces of furniture from the thrift stores, ensure to know their story. Keep in mind not all 18th and 19th-century woodwork was handmade and, therefore, not really antique.
Therefore always ask how valuable the furniture is before you purchase it. If you deal in woodwork, you develop an eye for these things. Additionally, flipping and then selling other furniture for a profit is what most people do. So you would not want to do that to a piece of expensive and antique furniture.
4) Salvage-worthiness
The one thing most woodworkers ask is, "is the piece salvage worthy?". This is mostly because no one wants to spend tons of money and effort on prepping and priming. This is the single most key part of the whole process. No one wants to flip a piece that will take a lot of time and, in the end, not being worth their time.
Repurposing furniture is an awesome job. However, the pieces have to be worth it. Many wood workers have their own personalized checklists that ensure they only flip good pieces. Durability, in this case, is very important.
The Bottom Line
A few furniture painting tricks come in handy when you have to paint your dresser or, generally, any bedroom furniture. If you are a newbie, or novice you can easily watch any video tutorial, and you will be able to take the first step. Always remember the first step to having good paintwork is priming. Always prime wood furniture well.


