Do you have an old popcorn ceiling that you want to revamp to remove the dullness? Or do you want to explore the popcorn ceiling technique but don't know how to paint the popcorn ceiling?
Either way, this article has a step-by-step procedure you should try if you want to know how to paint popcorn ceilings and revamp your entire room. But before we jump into the procedure, are you aware of what a popcorn ceiling is? If not, let us start by describing and defining it to get a clear understanding of this article.
What Is A Popcorn Ceiling?
A popcorn ceiling is sprayed with an acoustic texture made of styrofoam balls mixed in a drywall compound. The popcorn ceiling texture is common in most ceilings; it is cheap. Popcorn textured ceilings are cheap since they are easy for any professional to apply. You only need to mix up the texture and load it in the spray gun hopper. Next, hook up an air compressor and spray it directly onto the ceilings. After the application, you spray it white with a painter and you are done.
Popcorn ceilings are also popular since they reduce noise in rooms and hide ceiling imperfections.
Advantages and Disadvantages Of Popcorn Ceilings
1. Advantages
One advantage of painting a popcorn ceiling is that it is cheaper and requires less time and skill than a flat ceiling or other textured ceilings. If you are a homeowner and are into acoustic ceilings, you can give the popcorn ceiling a try as it leaves your ceiling with a popcorn texture.
The popcorn texture has styrofoam, which acts as a good sound absorber, thus reducing echo and any noise in the room. Popcorn ceilings are the best for homes with playful kids; you can paint a popcorn ceiling in bedrooms and kids' play areas.
Lastly, since you will be spraying a heavy texture onto your ceilings, the popcorn texture will hide all imperfections your ceiling may have.
2. Disadvantages of Popcorn Ceiling Paint
Popcorn ceilings may make the home ceiling look more outdated since there is competition from flat ceilings in the market. Another disadvantage is that popcorn ceiling textures were dated in 1977 to contain asbestos.
Therefore, if you will have popcorn ceiling paint on your older ceiling, you should test it for asbestos and be careful not to disturb its texture, then remove it. Let us now discuss how to paint the popcorn ceiling.
Tools And Materials You Will Need
- Extension Cord
- Step Ladder
- Drop Cloths
- Dust Mask
- Safety glasses
- Painter's Tape or a laser level
- 5-gallon bucket with screen for roller
- Flathead screwdriver
- Vacuum or Feather duster
Tips and Techniques
Before we move to discuss the procedure for painting a popcorn ceiling, there are a few tips to follow to avoid disasters or make sure you are on the right track. First, test the material's water solubility; you can squirt water onto the area you want to paint to test its solubility.
The procedure is to test whether the area was painted previously or not. If the water absorbs faster to a soft stipple texture, make sure you use an oil-based primer and a sprayer to prevent loss and paint peeling after you finish painting.
a). Rolling vs. Spraying Your Popcorn Ceilings
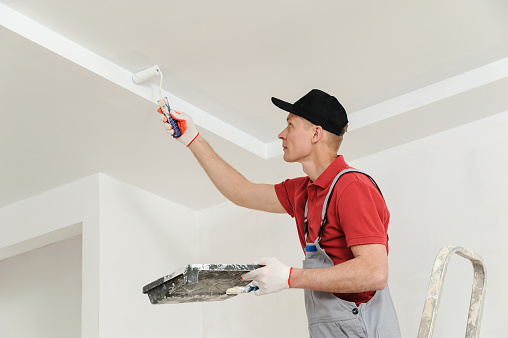
The most frequently asked question on how to paint popcorn ceilings is whether to spray it or use a roller; here is the answer. If you already have a sprayer or have access to one, it is better to use a sprayer rather than a roller.
Spraying ceiling paint is faster than rolling out. Rolling consumes time; you can end up rolling the whole day. Also, if you want a better finish that will not lead to your popcorn texture falling off, you should use a sprayer.
Popcorn texture is not usually bonded very well to your ceiling drywall; it could sometimes fall in big chunks when you roll new paint onto your ceiling. However, the ceiling texture will not fall off as long as you don't use too much paint when you spray.
The only problem is when most homeowners do not have a sprayer readily available when they want their ceilings to be repainted. Therefore, if you will paint a large area of your home, make sure you do a pre-setup before repainting. However, if you are going to paint just a room, there is no need to set up a paint sprayer.
b). Removing Ceiling Stains
The common stains in a ceiling are water stains, grease stains or unknown stains. Sometimes it could be hard to paint over these stains. That is why you need to remove them. Even if you use flat paint, you may not hide the stains since when your paint dries, the stain sips through.
Professional painters recommend using a stain-blocking oil-based primer to achieve the best result. You can put your paint in an aerosol can to minimize the pull and maturation of the material. If you use a roller, roll on it so long as you avoid pressing too hard. It would be best to let it dry before painting it again.
Pre-painting Preparations
It would be best to dust the ceiling first before painting your ceiling. Dust and debris can collect on the painted surface; you will have to clear debris as a way to ensure adhesion. You can use a feather duster or a vacuum with a brush attachment. If stains need cleaning, use water and dish soap or laundry detergents to remove them. Test for water solubility since popcorn doesn't react well with water. You can scrape off the stain instead of washing it out with water if need be.
Drips and Splatters: It is almost hard to avoid ceiling paint dripping on the entire room. To avoid drips and splatters, use a high-quality product and a thick napped roller cover to cover the light fixtures and the entire room from latex paint. You should also wear protective glasses and a dust mask during this process.
Peeling: To avoid peeling, you should not go back and forth over the same spot; instead, lap over the edges to prevent streaking. The edges should blend into each other and don't run over the surface when too dry.
Cut In Ceiling With A Brush: Use a 2-inch angled brush to cut all the edges where the ceiling meets the walls. Next, you can use painter's tape to cover the wall adjacent to the ceiling to help you keep clean straight lines. You can now paint around ceiling lights and other obstructions.
Steps To Follow While Applying Paint
If you are going to prime, ensure you cut from the edges and around the fixtures with more paint. Then apply your primer.
Using a roller: If you use a roller, don't use the W method; instead, roll the pain in a straight motion as one long directional line overlap at the edges. You can start from a corner and overlap in small sections. Do not roll over a wet area immediately after you have applied paint. It would be best if you used a nozzle one foot away from the area you are covering.
Using a sprayer: If you use a sprayer, ensure you have established a pattern and followed it.
Allow the area to dry completely; a flat ceiling will dry quicker than a popcorn ceiling. You could leave the ceiling untouched for 3-4 hours if you used the rolling method, while if you used the sprayer, 1-2 hours would be enough. If you want to add some color to your popcorn ceiling, you can repeat the above procedure with the color of your choice.
Allow it to dry, then add a second coat again in the opposite direction as you perpendicular. Do the same for rolling if you want to create a pattern. Do not forget to cover light fixtures if you will paint the entire ceiling.
How To Get Clean Edges
Achieving clean edges can be a little bit tricky. The most common trick that people use is to cut in using the following tools and procedures: Let us discuss
Using a flathead screwdriver, chip away a stipple close to the walls. Apply a painter's tape close to the wall and 'cut in' you can use a brush attachment to paint about 2-3 inches along the perimeter of the edge of the ceiling wall. The best brush for this paint job will be an angled brush; you can also buy special edgers that come in roller form from a paint store. The roller edgers are the best for getting into the stipple.
Painted Acoustic Ceilings
Not all acoustic ceilings are textured ceilings. Acoustic ceilings are available in different styles and designs. The common thing about acoustic ceilings is that they are all designed to absorb sound. Apart from this popcorn style, there are the glued and drop styles. In a drop style, styles are suspended in a grid, while in a glue style, the tiles are glued.
Best Option For Repainting a Previously Painted Surface
If the surface you are dealing with was previously repainted, You may need the first coat of paint only. It will depend on if the ceiling has rough surfaces, the need to hide imperfections or the color you want to achieve.
If you make a darker ceiling light cover water or nicotine stains, you will use a primer. Also, if you apply white on lighter colors, you will not need to prime. Always ensure you get the ceiling tested for water solubility before you pour water.

