Painting walls in your house is a great way to spruce up your space. For this reason, it is helpful to know how to paint.
If you are a newbie, there's absolutely no need to worry, as our guide below will show you how to professionally paint a wall.
What Should I Know Going Into a DIY Painting Project?
Do It Yourself (DIY) projects are fun—especially painting projects. A good paint job will be appreciated for months to come.
However, there are some of the things you should know before going into the job.
For starters, have good tools. It is recommended not to hold back when getting the best paint brush or painter's tape.
You will essentially save more money in the long run, using good tools. Conversely, cheaper tools will do a mediocre job at best.
It would help if you also took more time to tape over anything you don't want to paint. Paint has a habit of getting everywhere.
It would be wise to remove everything near the wall you want to paint, like furniture or carpet.
Tools You Will Need To Paint A Wall
If painting your bedroom wall is your first DIY project, there are a few things you should have. If you already have these tools, you don't need to purchase them again.
- Drop cloths or cardboard to catch any excess paint
- Paint brushes (select between synthetic brushes and natural bristle brushes)
- Painter's tape
- Your paint of choice
- Primer
- Sanding machine
- Paint rollers
- Paint pads
- Paint tray
How To Professionally Paint a Wall
Below is a step-by-step manual on how to mend and paint your entire wall. It would be best if you had settled on the wall you want to paint by this point. Ensure you know what type of wall you are working with.
Settling on a particular space will give you more time to prepare.
Here is how to paint a wall.
Step 1 - Prepping the surface
Begin by removing any switches and electrical outlet covers. This is to ensure the paint doesn't get on them.
It is also to make sure you get paint on every nook and cranny. Next, store them in a plastic bag so you don't lose any screws.

Next, move all the furniture away from the wall you want to paint. Then, cover them with plastic sheeting to ensure you don't get paint on them.
Next, you want to find holes and dents and fill them with spackling paste. Use a putty knife to pack and spread the paste.
After it dries, it's time to get to sanding. Using a sander on fine grit, buff out any excess paste.
You can then sand off the existing paint on the wall. Again, sand vertically and overlap each vertical stroke.
This will ensure you don't miss any spots. This sanding method will also ensure a very even removal.
When sanding, you should consider not applying too much pressure. Applying too much pressure will cause the sandpaper to stop working.
Step 2 - Use Painters Tape
After prepping the wall surface and removing any leftover paint, use painter's tape to map out the areas you don't want paint on.
Then, use your putty knife to get the tape to adhere to the wall surface well.

If you use painter's tape, you won't have any problems with paint bleeding through. However, you won't get clean lines if you use any other type of tape, like masking tape.
Authentic painter's tape can stay on your wall for more than seven days and still peel off neatly.
Step 3 - Priming
Before applying a primer, wipe the wall with a damp cloth. This will absorb any dust. It will also ensure no dust particles that dry in the paint.
The next step involves applying a coat of primer. Remember that if you want a professional-looking finish, you should consider using a tinted primer.

Why? Remember all the holes you filled? They will glare out of the paint job if you don't use a tinted primer.
You can always add a little paint of the finish paint. This will make the finishing color pop out. You might require fewer coats of paint.
It will also give you an amazing and smooth finish with every coat of paint.
Step 4 - Use Paint Additives
Most paints these days dry very quickly, a little too quickly, even for professional painters. As a result, working with such paint can be difficult.
Adding additives such as Penetrol will delay the paint's drying time.

This will make it much easier to apply paint since you will have more time to rectify mistakes. Most paint mistakes should be corrected when the paint is still wet.
The additives prevent lap marks and brush strokes from appearing on the wall. Before you start painting, pour a few ounces of Penetrol into your paint and stir it around.
Step 5 - Painting
You need to have the right brush. A good paintbrush will give you more control, which will help you paint like a pro. A cheaper brush will leave loose fibers all over the wall.
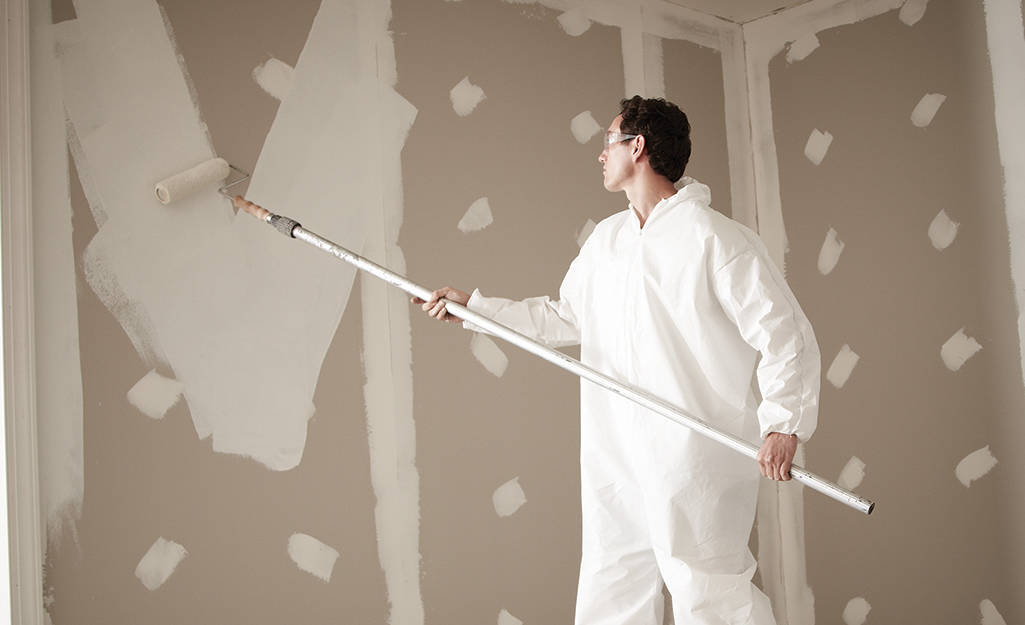
You will also need roller covers and an extension pole to get to the high areas of the wall to relieve some strain off your back.

Before you buy paint, get a professional painter to give you a rough estimate of how much paint you will need. After you get the estimation for one wall, box your paint.
Boxing paint refers to mixing all your paint in one big container. This gives you an even finish with every coat. Additionally, there should be enough for a few coats of paint.
After going in with one coat of paint, you can add a second coat. But, again, ensure to paint from top to bottom.
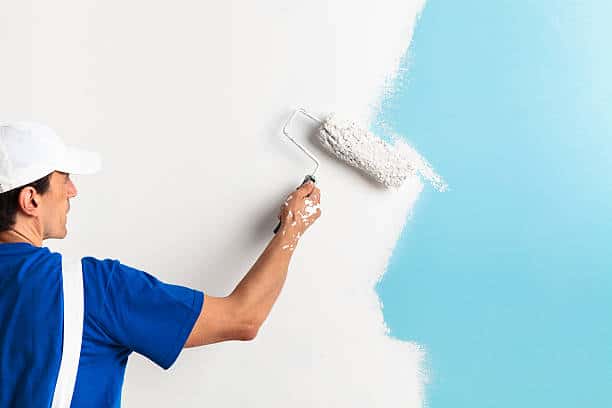
Pro tip: Paint your wall in overlapping "W" when using a roller. This will give you even layers of the same color when you apply multiple coats.
Factors To Consider Before Painting a Wall
Before you go off and start painting your interior walls, you need to know a few things before you start.
1) Performance Over Price
Quality paint and quality brushes will always do a great job. It might cost more to purchase all the paint and brushes, but your paint job will last for years.
However, if you cheap out, you might need to repaint in a few months.

Painting a single wall in a room will give a fresh look to an entire room. Sometimes a single accent wall can open up a space and make it appear larger.
2) Painting Techniques
It is important to thumb down a painting schedule before you start painting. Painting the wall from top to bottom is a great place to start.

For example, if you are painting a bold accent wall, start by painting the lighter colors on other walls. If any light color paint goes onto the accent wall, it will be covered by dark paint.
Additionally, if you are repainting your wall, especially dark walls, apply a primer and two coats of paint. This ensures that the original color is not showing through.
3) Time And Labor
Painting requires a lot of time, even for a single wall in your living room or bedroom. Prepping a wall takes at least 30% to 50% of the total time. Most paint job disasters are due to inadequate prep work.

If you skip the prep work, your paint job will not last. Pro painters also strongly suggest fixing cracks and holes before applying that first coat of primer. Doing all this requires a long time.
The time you spend on your next painting project will require time away from other engagements. Furthermore, your painting skills will come into question.
Therefore, you might need to enlist the help of friends or family. All the time and labor you will spend on painting should be considered before you paint a room or a wall.
4) Type of House You Have
There are modern houses, and there are older houses. Keep in mind that both houses have different needs.
For example, the paint requirements for older houses are different compared to modern homes.

For starters, most older houses have lead paint (houses built before 1978). Before you get to painting any wall in your older house, ensure to consult a professional painter.
Some modern homes also have high ceilings and domes. Unless you are a professional painter, there are some projects you might want to enlist professional help.
Therefore do your homework before undertaking any painting projects.
5) Costs
After all, is said and done, you still have to work out costs. With every home project, there will be additional costs.
However, before you dip your foot in the DIY world, you should have a rough estimate of how much you will spend.

It will be significantly more expensive if you have to start from scratch by buying new equipment and supplies.
You might not spend as much if you already have some quality equipment. It would be best if you also considered purchasing the best equipment and items. Eventually it will be much cheaper.
Frequently Asked Questions (FAQ)
i) How Do Professional Painters Get Straight Lines?
Most professional painters know that there is no one way to get straight lines. Different painters use different methods. Painter's tape is widely used to get a sharp line on any paint job.
Secondly, some painters use an edger or painter's shield to achieve crisp and straight lines. On the other hand, other painters use an angled brush and a steady hand.
It's all about learning a method that is right for you.
ii) How Many Coats of Paint Should I Put on My Wall?
Most of the time, two coats are adequate to give you a nice finish. However, that applies to lighter-colored paints. Dark-colored paints might require three coats to get a perfect finish.
While two coats might be normal, it also depends on the type of surface you are painting. The quality of the paint definitely matters, as well as if you used a primer or not.
If you carefully followed the steps outlined in the above section, you should be okay with two coats.
iii) In what Order Should I Paint My Wall?
Professional painters usually start by painting the trim like window frames, followed by painting the ceiling, and finally the walls.
In our case, since you are only painting one wall, it makes sense to go from the trim to the wall.
This method is easier because it makes much more sense to put and remove the tape on the trim than apply it to a whole wall.
iv) Can I Paint My Wall in One Day?
This depends on whether or not you prepped or didn't. It also depends on how many coats of paint you want and what paint you use.
Some paints need at least 6 hours to fully dry, while others dry in 45 minutes.
You could paint your wall in a day, provided you already gave the primer time to dry. However, if you factor in prepping and primer application, you should give it two days.
v) Can I Paint Over Old Paint?
Yes, you can. However, there are a few rules to painting over old paint. Firstly, The wall has to be in great shape. The paint has to be immaculate. Cracks and dents should not be on the wall or paint.
Only then can you apply a new coat of primer and two more coats of new paint. Additionally, if the previous paint was latex paint, the current paint should also be latex.
Remember, if you are painting with a dark color, you might need an additional coat.
The Bottom Line
After painting, install some door stoppers to protect your new paint job. You should expect a few accidents and a few touch-ups as a beginner.
As a beginner, you should get an elegant finish if you follow the guide we have outlined for you.
That being said, don't forget to clean your brushes when you are done, and enjoy your new wall.

