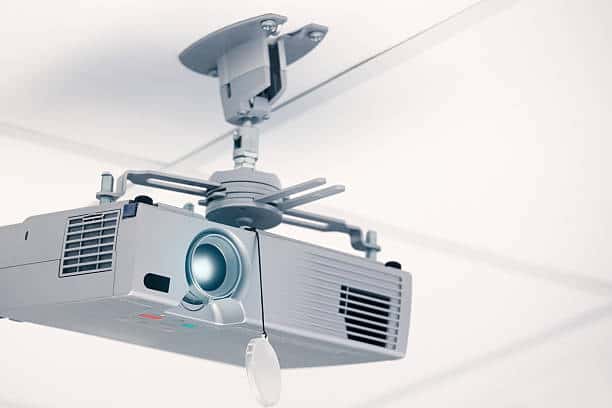
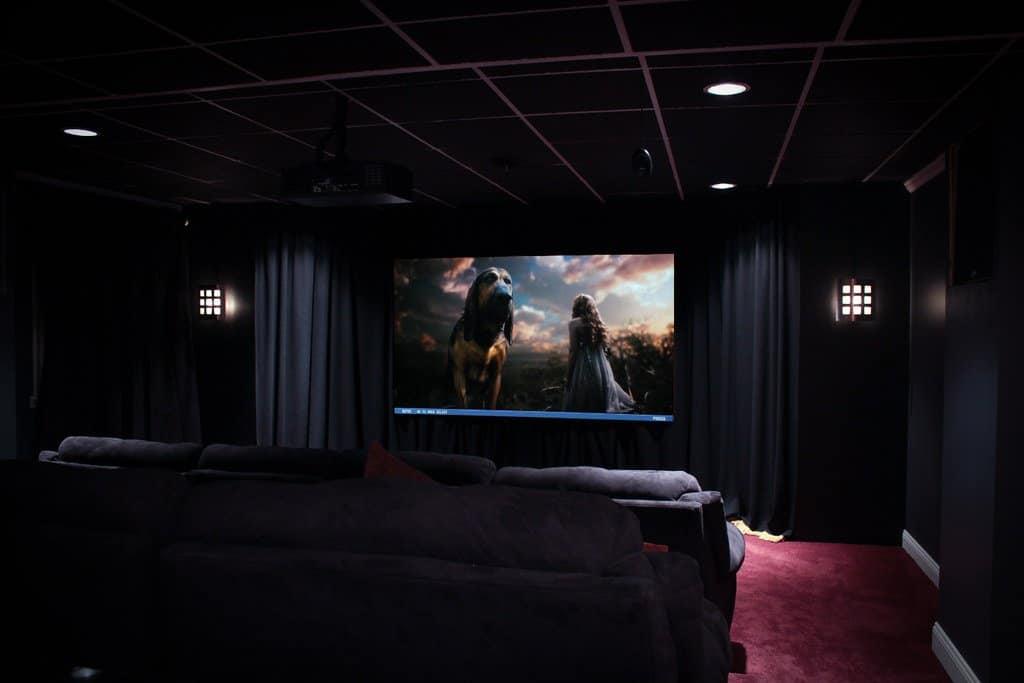
A projector is an excellent method to improve the quality of your home theatre. Besides, it gives you a huge screen for just a fraction of the cost of a large TV. However, with a projector, there is always the question of where to place it. Here's a guide on how to mount a projector to the ceiling.
Some of the benefits of mounting your projector to the ceiling are; giving your home theater a professional appearance and saving space in the room. However, keep in mind that when mounting a projector on the ceiling, you will need to do some calculations and measurements and consider the screen and room sizes. Read on!
What You Need to Mount a Projector to the Ceiling
- A step ladder
- An electric drill
- A lot of screws
- A screwdriver
- 2×4 boards & anchor bolts
- Measuring tape
- A pencil for marking purposes
- Mounting bracket
Steps on How to Mount a Projector to the Ceiling
Step 1: Screen Placement
When it comes to the positioning of the screen, first, you need to know the screen size (height and width) on which you want to project the images from the projector. You need to know the measurements since you will need them to figure out where to place the projector.

Image Source: projectortop.com
Secondly, determine the height of your screen. The height will depend on the layout of your room. So, if your room has a single couch and a few chairs, a suitable height would be between 61 and 91.5 cm (24 and 36 inches) from the floor.
Conversely, if your home theater has multiple rows, we recommend raising the screen so those not in the front row can still see what you're projecting on the screen. Besides, remember the screen size when deciding how far above the floor to set the screen, since starting it too high might not give enough space for the whole screen.
Lastly, you can decide the best spot for the screen, but it will depend on the layout of your room. You have a little option as to where the screen should be placed. However, ensure the wall has no direct light as light on the screen will cause the image to appear washed out.
If you have no otherwise but to use a direct-light wall, we recommend opting for an ambient light rejecting projector screen. And if you intend to paint the screen on the wall, use ambient light rejecting paint. Also, consider purchasing blackout curtains for windows.
Step 2: Determine the height of the ceiling

Image Source: mobile.twitter.com
Ensure the projected screen is about 100 inches in height to enjoy the best visual quality. To do this, ensure that your project is installed at the perfect height. Besides, to determine where the projector should be set, first measure the height of your ceiling.
Step 3: Determine the Projector placement
When it comes to projector placement, there are a few things you need to know; the projector's throw distance, the projector's vertical offset, and horizontal lens shift.
i). Measure your projector's throw distance
Throw distance is the distance between your screen and your projector's lens. To calculate the throw distance, use the projector's throw ratio, usually stated in the instruction manual as either a range of numbers or a single number (for projectors with no optical zoom). The formula is; throw ratio x screen width = throw distance. Besides, the formula is ideal for any unit of measurement; centimeters, inches and feet.

Image Source: projectorcentral.com
For instance, with a 120-inch screen and a throw ratio of 1.4:1 to 2.8:1, you can mount your projector 168-336 inches from the screen. The formula is as follows 1.4 x 120 in. = 168 inches or 2.8 x 120 in. = 336 inches.
On the other hand, you can play around with the formula. If you want to select a screen size based on where you intend to put your projector, use the following formula: Screen width equals throw distance divided by throw ratio. Let's say you want to mount your project 16 ft away from the screen, and it has a throw ratio range of 1.4:1 to 2.8:1.
Using 2.8:1 as an example, you would divide 16 ft by 2.8 to get a screen size of 5.71 ft. So, with a throw ratio of 1.4:1, you may pick a screen size ranging from 5.71 to 11.43 ft.
ii). Determine your projector's optimal throw distance
Since you can now calculate the throw distance, determining the best throw distance for your projector will be easy. First, however, consider the following:
- Power cables- Projectors usually have two cables (power and HDMI cable). Therefore, ensure you have the correct-length cables or have you are close enough to your receiver to plug in your projector.
- Seating position- If your projector is noisy, you may not want it to be directly above your head.
- Image quality- The image quality will vary even within the throw distance range, so we recommend testing out the distance you prefer before deciding where to put the projector. Besides, mounting the projector closer to the screen results in brighter images, while mounting it farther from the screen results in greater contrast and a sharper image.
III). Determine the vertical offset of your projector.
Your projector's vertical offset is how high or low it has to be for the image to project at the right screen height. Your projector's instruction manual should show it as a percentage. For instance, a +96.3% offset indicates that the images will project higher than the lens, whereas a -96.3% offset indicates that it will project lower. Besides, projectors are usually mounted upside down, so the positive offset is more crucial to consider.
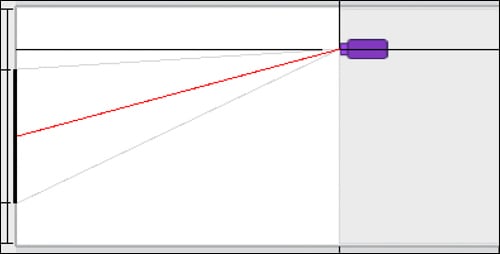
Image Source: projectorcentral.com
On the other hand, most projectors have a vertical lens shift that allows you to modify the image height without moving the projector. Therefore, if your projector has this feature, you can hold it at different heights while adjusting the lens shift to determine where it works best before hanging it. But if your projector does not have a vertical lens shift, you must mount it at the recommended height.
iv). Determine the vertical position of your projector.
To determine your projector's best vertical placement, use the following formula: screen height multiplied by offset percentage equals the lens distance above or below the screen center. Conversely, for a projector with a -96.3 percent to +96.3 percent offset, consider the following:
- A standard high-definition projection screen usually has a 16:9 (1.78:1) aspect ratio, meaning it is 1.78x as wide as it's high. So, if your screen is 100 inches wide, it will likely be 56.18 inches high.
- To determine the vertical offset for a 56.18 inches screen, multiply 56.18 inches (height) by 96.3 percent ( or 0.963 offsets) = 54.10 inches. Therefore, you can mount the projector anywhere between 54.10 inches below and 54.10 inches above the center of your screen.
v). Find the horizontal lens shift
When mounting your projector, ensure it's horizontally aligned with the center of the screen. However, if your room arrangement requires otherwise, you will need to determine the horizontal lens shift.
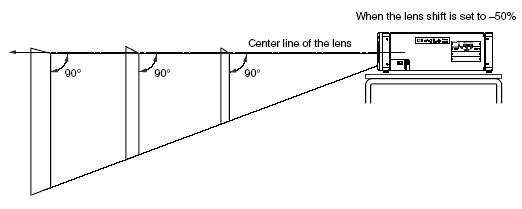
Image Source: projectisle.com.au
Horizontal lens shift follows the same principles as vertical lens shift, except that you use the following formula: screen width x offset % = distance of lens to left or right of screen center.
Step 4: Make holes in the ceiling.
After determining the projector placement, use a power drill to make the appropriate holes in the ceiling. Ensure the area on the roof has proper concrete; otherwise, an accident may occur. If the ceiling is not concrete, you can use the extended wood panel to join two joists in the ceiling before installing the bracket.
Step 5: Choose the best mount for your projector
Projector mounts usually vary in terms of where they attach (ceiling or wall), whether they come with piping or arms for changing the height of your image, and what type/weight/size of projector they can support. Therefore, it would be best to consider these factors before selecting a projector mount.

Image Source: pointerclicker.com
Look for a high-quality projector mount; otherwise, low-quality mounts can drift over time, causing your projector to shift out of alignment with the screen. Also, depending on the ceiling type, you may need to purchase adapters for your mount.
Purchase a suspended ceiling kit for a suspended ceiling (one that's lowered down from the structural ceiling and so cannot hold heavy weights). Conversely, purchase a cathedral ceiling adaptor if your ceiling is high and arched.
Step 6: Attach the ceiling mount
Attach the mount to the projector by following the instructions included in the mount kit and the projector. Also, ensure that the mounting plate aligns with the projector once attached. Moreover, before attaching the projector to the ceiling, ensure the mount is firmly attached.
Step 7: Determine the mount-to-lens distance
Using a tape measure, measure the distance between the front of the projector's lens and the center of the mount. Then, add this distance to the range distances between the projector's lens and the screen and adjust the throw distance accordingly. For example, if the mount-to-lens distance is 6 inches, the new total for the throw distance of 16 ft will be 16.5 ft.
Step 8: Mount the projector and firmly secure it
We recommend using a stud finder to locate a ceiling stud (joist) within the proper range of screen-to-projector distances. Then, use a screwdriver, lag bolts and a wrench to secure the stud mount firmly.

Image Source: pointerclicker.com
To use a stud finder, run it along the wall until the indicator indicates it has found a stud. Besides, the stud finder's manual has more comprehensive instructions. And if there are no studs in the area where you want to mount the projector, you will need to reevaluate the spot or attach a piece of wood that bridges the distance between the two joists.
It would be better if the wood were hidden inside the ceiling. Alternatively, you can drill through the ceiling, install anchors, and then screw your projector onto it. When mounting the projector, use lag bolts (fasteners with flat, hexagonal heads and cylindrical, threaded shafts).
You can screw these lag bolts directly into wood. Also, you can screw them into concrete with a lag insert. The lag bolts should be 3 inches long and 0.3125 inches wide for your projector installation.
Step 9: Secure the power and HDMI cables
Attach the cables to your projector following the projector's guide manual instructions. Then, use wire molds (cord covers) to your wires to blend in with the wall as they run from your receiver to the power outlet.
On the other hand, if you want to keep the cables neat (you don't mind the appearance of the cables), you can simply fasten them at certain spots on your wall using cable supports and fasteners. The supports and fasteners are readily available at your local hardware store.
Step 10: Adjust the projector settings

Image Source: projectortop.com
Turn on the projector and adjust the lens shift, zoom, and focus to the proper settings by following the instruction manual. Also, set the required contrast, brightness, and color on the projector according to the instructions. Additionally, before fine-tuning, ensure that the image is as precise as possible. By doing this, you will have saved some time and stress when fine-tuning.
Frequently Asked Questions on How to Mount a Projector to the Ceiling
1. What are the advantages of mounting a projector on the ceiling?
Most people prefer ceiling mounts since it keeps the projector out of the way. Others can walk behind the project without blocking the light when someone uses the project.
2. What is the best projector placement?
It would be best if you mounted the projector with the center of the lens 8 inches above the top edge of the screen. It usually has a little offset of roughly 21%. So, it should be .21 times the height of the screen.
3. How high should I mount my projector screen from the floor?
The bottom of the screen should be about 40-48 inches above the floor in a room with a level floor and multiple rows of seats. And before mounting it, examine any obstacles and ensure that the lowest part of the screen is visible from all seats.
Featured Image Source: istockphoto.com

