When you buy a new can of paint, you need to be careful when opening it for two main reasons; firstly, the paint can be made of volatile organic compounds, VOC, which are known to be toxic to humans; according to this review. Secondly, opening without caution can leave you with a big paint mess to clean up. So, we show you how to open a paint can like a pro.
1. How to Open a Paint Can with a Paint Can Opener
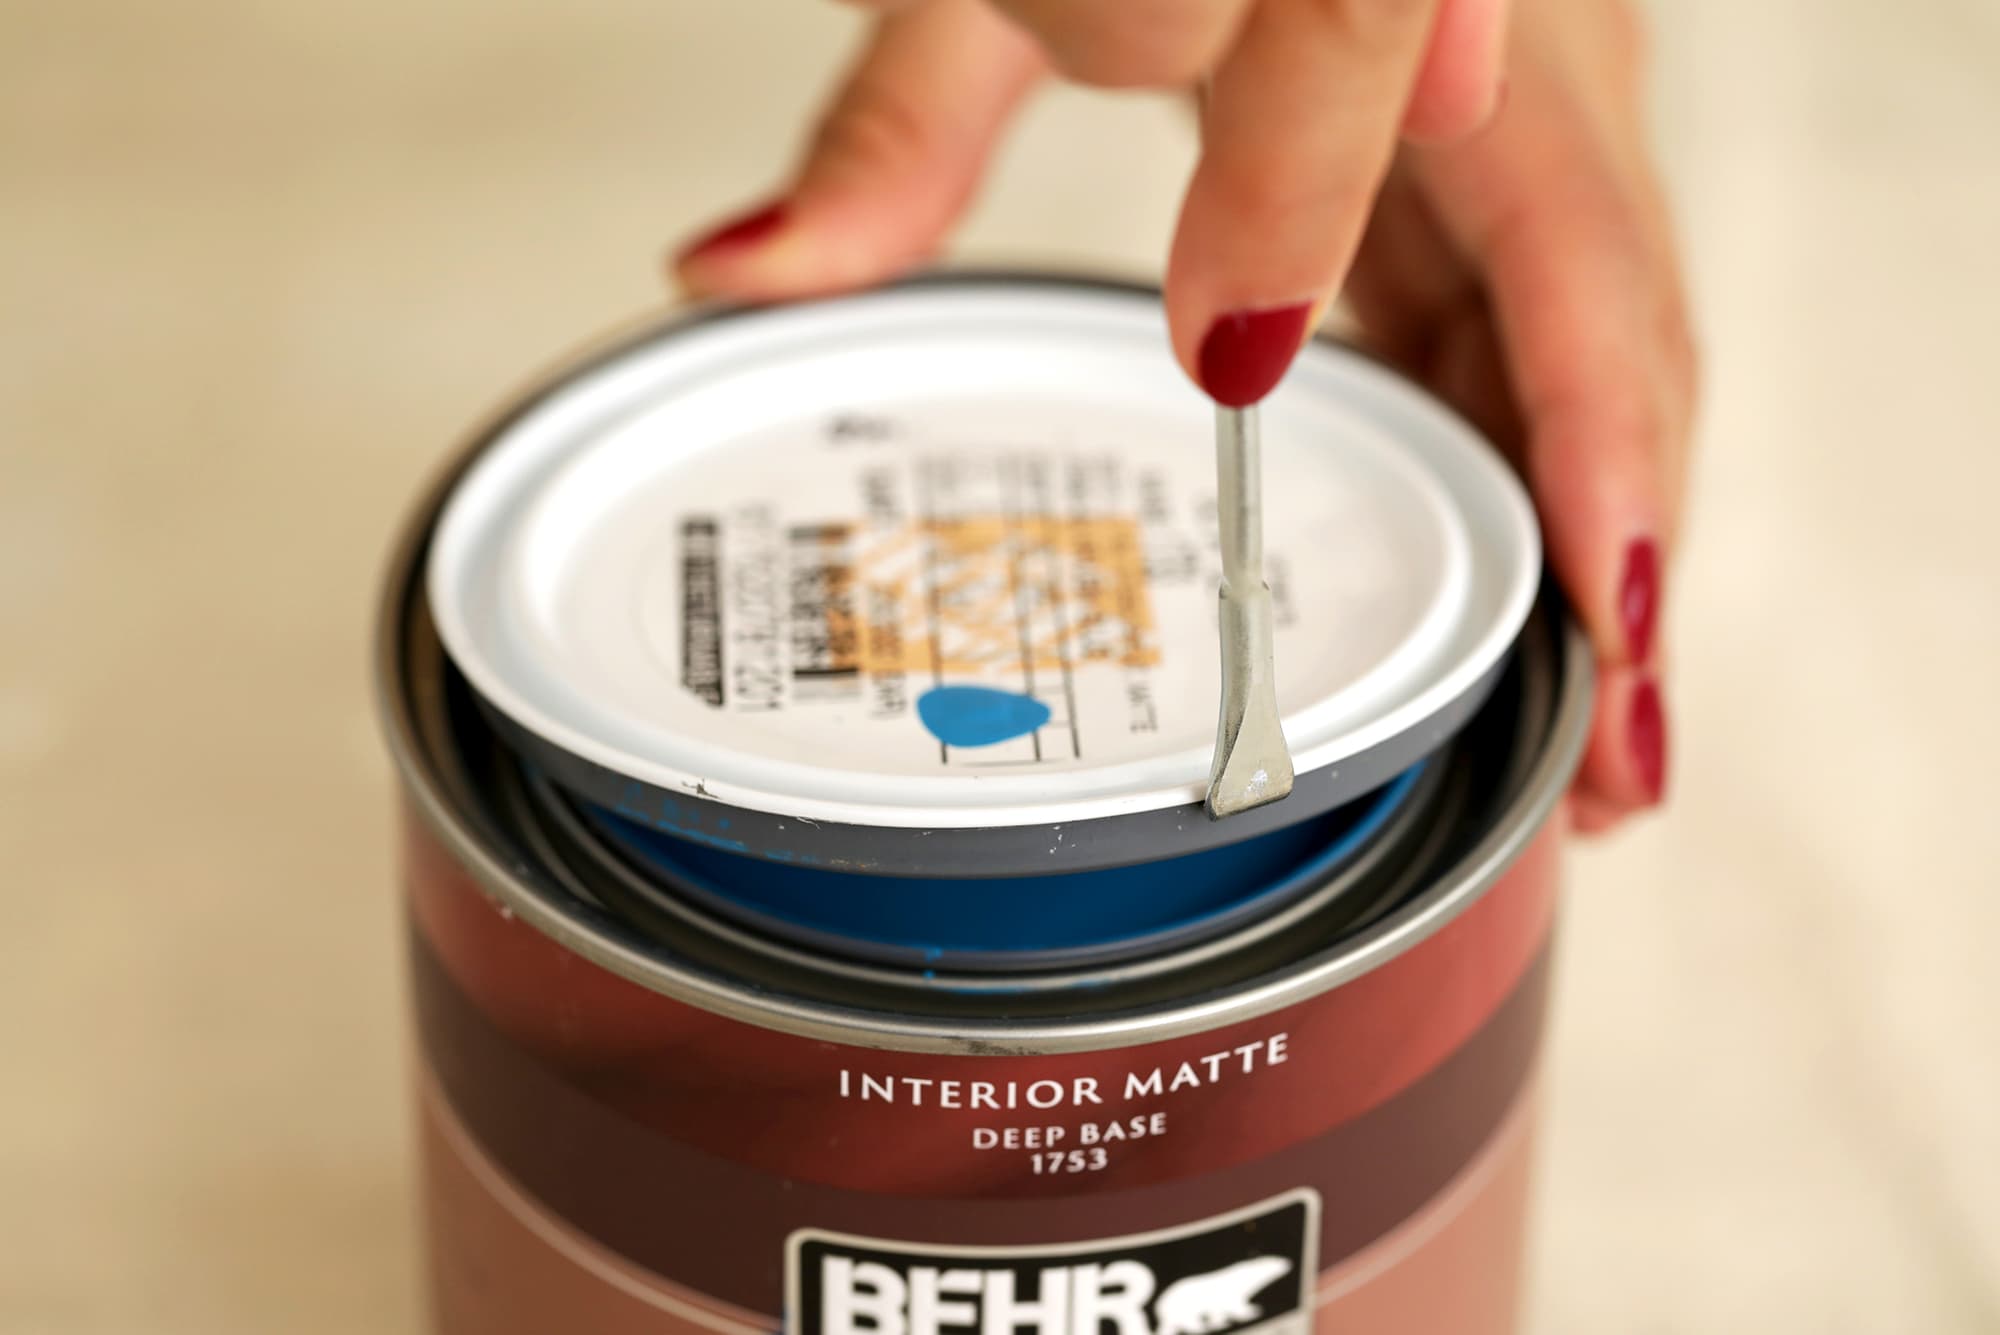
image source: apartmenttherapy.com
When you want to paint your home or kitchen cabinets for a new outlook, do not let your best paints leave a hot mess when you open them. Instead, when you get your fresh paint at your local paint store, ask for a paint opening tool or a paint key, as it is also known. This tool is given free after you purchase the paint in most cases, but it also does not cost a lot of money.
When you have your paint can opener ready;
Insert the opener's flat end or curved tip beneath the paint can lid.
When your can opener is inserted beneath the lid, start prying the lid open by tilting the paint can opener handle.
Repeat the movement around the can until the lid is free.
Gently lift the lid to expose your paint and start your beautiful projects.
When buying a can opener, pay attention to its size and handle. It needs to be strong, so it can't break under the lid. In addition, the opener should have a grippy handle and a long stem that gives you enough room to tilt the handle when opening the lid.
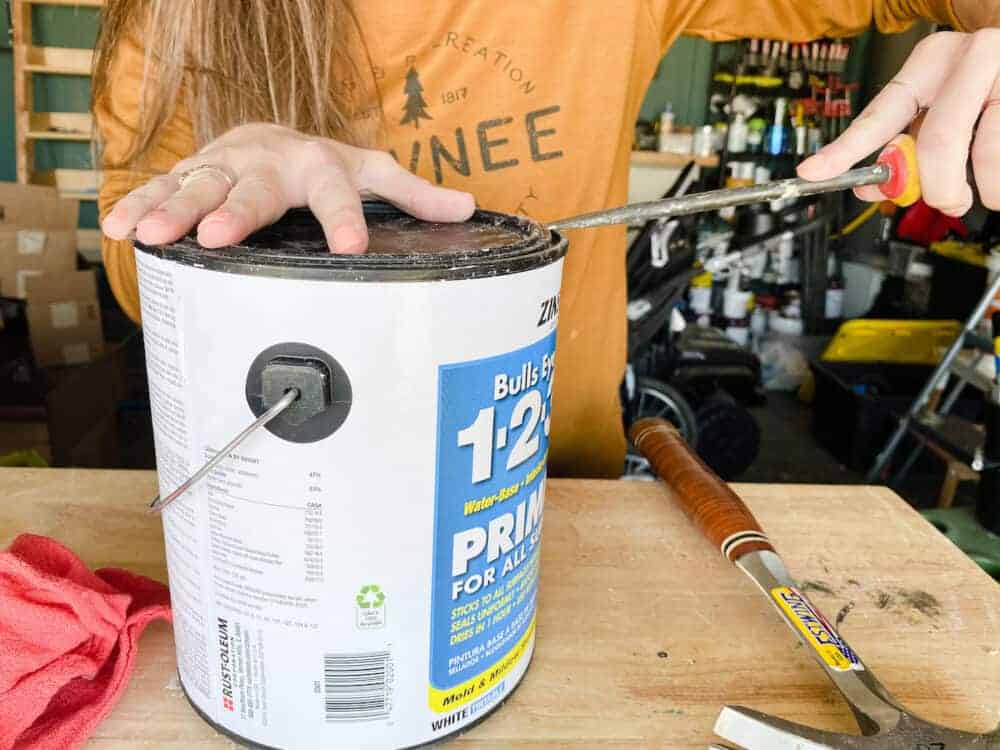
2. How to Open Paint Cans with a Screwdriver
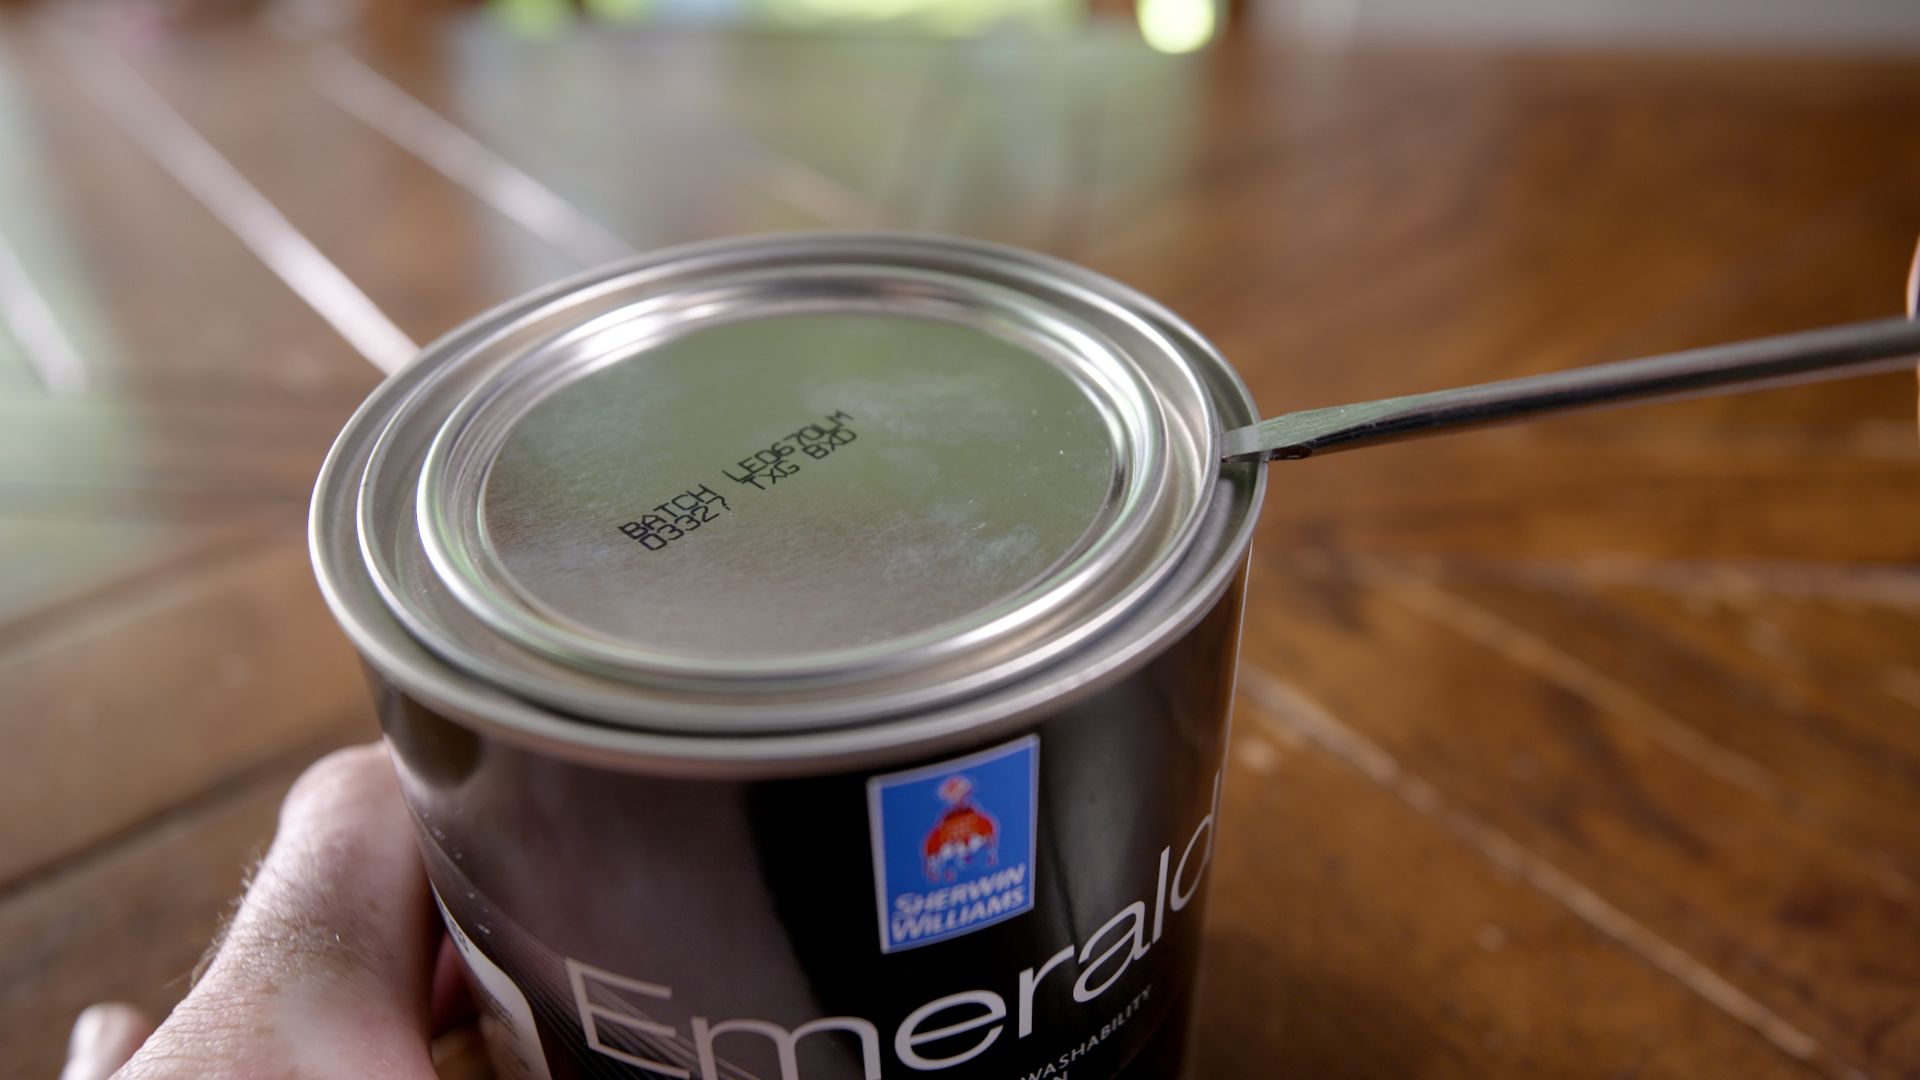
image source: housebeautifuul.com
If you have the best paint for your paint projects, you will need to ensure no wastage happens as you open the cans. In addition, you also need to avoid damaging the lid so you can cover the wet paint cans if you have leftover paint.
Do you have a flat head screwdriver nearby? It will be enough to help you open the paint can without spilling the paint all over your deck or workstation. Here is how to open a paint can with a flat head screwdriver.
Notice a small space where the lid meets the can. You need to lodge the head of your screwdriver in that gap.
Tilt the screwdriver handle to pry the lid open.
Repeat step around the can circumference until the entire lid comes off freely.
Now that you can access your paint inside, you can start your painting project, and make sure to use the excess paint on the lid first.
When using a screwdriver, you might need to wear gloves to prevent accidents. In addition, a screwdriver is a bit sharp, so you can easily dent the lid, making it impossible to get an air-tight seal after you finish painting. Therefore, do not exert too much pressure when lodging the tip to pry the lid open.
Finally, since the screwdriver is a versatile tool you want to use for other projects, you need to avoid getting paint on its tip. Luckily, you do not need to get paint on it as you will only use it to remove the lid. However, if you get paint on your screwdriver, it is best to wipe the paint off with a paper towel immediately before it dries.
3. How to Open a Paint Can with a Painters Tool
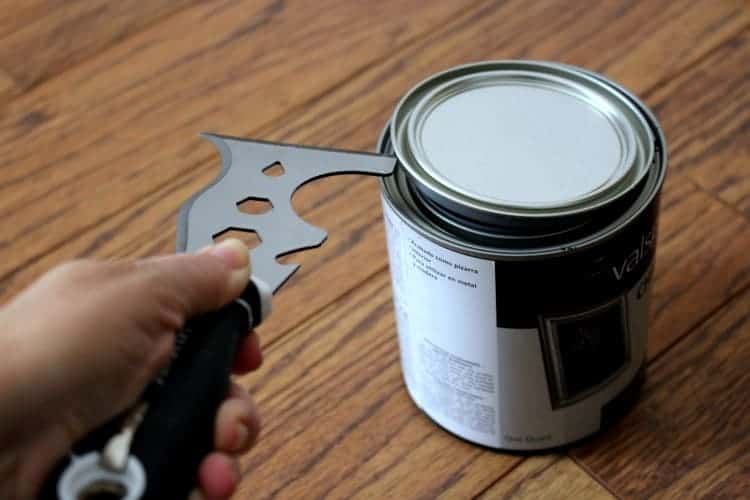
image source: thepalettemuse.com
When you have just come from a hardware store with a new can of paint, the last thing you want is to struggle opening the can. However, if you are a frequent painter working on walls, wood, and more, there is one tool you most probably have; the painter's tool.
A painter's tool is a handle tool for all painting projects and can do many things, such as punching nail holes or removing mold. The more things you want to do with your tool, the more features or parts it will come with. The tool is available in different sizes, indicating more features, from 5-in-1 to 17-in-1 tools.
Now, while the painter's tool can look confusing with its many parts, it is pretty easy to use when you have paint cans you can't open with bare hands. Here is how you can use this versatile tool to open cans;
Place your new paint can on a flat surface.
With the painter's tool in your most dominant hand, place the shorter flat part of the tool.
Wedge the flat end in the space where the paint can meets the lid and gently push the tool's handle down to pry the lid open.
Rotate the can as you wedge the painter's tool in various points across the rim to loosen the seal. Gently lift it to reveal the paint when the lid comes off the can. Avoid spilling the paint lying on the lid.
Like the screwdriver, you need to avoid dipping the tool in paint so you can use it with your other projects. Luckily, this tool is quite easy to use as it often comes with rubberized grips, making it difficult for it to slip as you open a paint can. However, you will need to prevent denting the lid so you can cover any excess paint you might leave after your project.
4. How to Open a Paint Can Using a Putty Knife
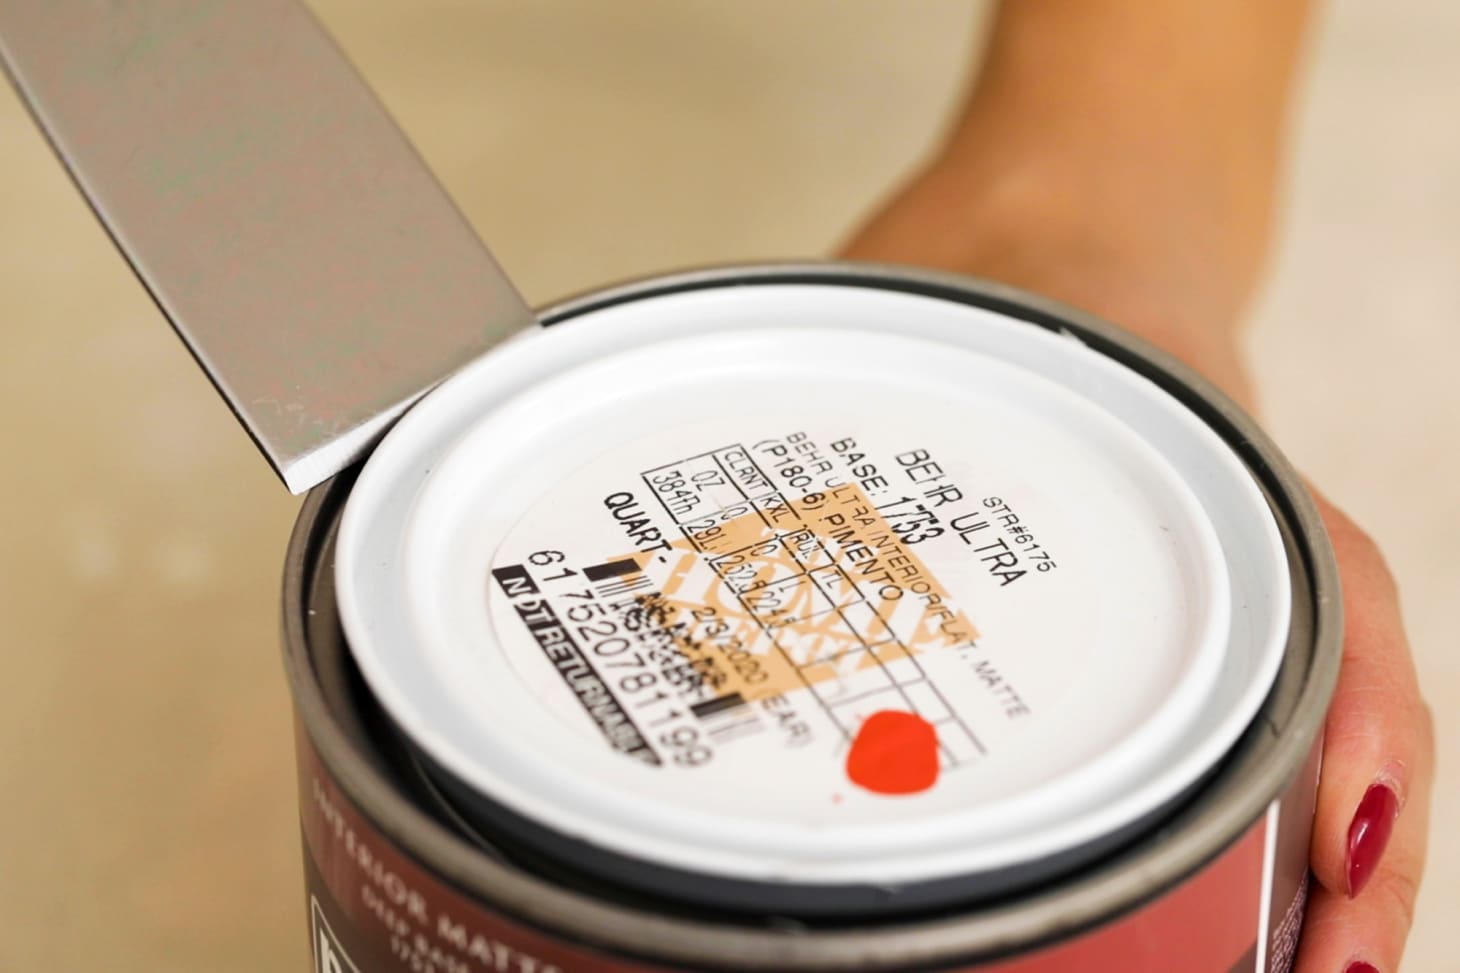
image source: apartmenttherapy.com
A putty knife is a tool you use to get the best finishes for your painting process. If you have one around your workshop, it is a great tool to use to pry open the lid on your Behr paint cans. Before getting yours, ensure it has a stiff neck, not one that easily bends under heavy use. If yours is strong, here is how to open a paint can using the tool.
With your paint can on a flat surface, insert the end of this knife into the space between the can and lid.
Gently pry the lid open.
Rotate the can and repeat the step until the lid comes off.
5. How to Open a Paint Can that Has Clips

image source: pinterest
Ever come across a paint can closed with clips? The clips provide the best seal to protect your paint from external damage in most instances. The paint can clips clip onto the rim circumference and are fairly easy to remove.
You can wedge a small flathead screwdriver or small needle-nosed pliers underneath the arch of each clip to remove it. Then, when the clips pop free, you can easily lift the lid to expose the paint.
6. How to Open a Stuck Paint Can

image source: handycrowd.com
When you have a big painting project, it is easy to forget the best practices to prevent spilling paint on the edges of your cans. If you leave wet paint along the rim of your can and then cover it with the lid, this seal will be harder to manipulate when you want t use the paint again.
So, when you have dried paint on your cans, and it is hard to pry open, you can use;
A paint scraper to remove the dried paint from the rim circumference. Once most of the paint is removed, you can then pry the lid open using a screwdriver, painter's tool, or a paint key.
Loosen the stuck edges using needle-nosed pliers. Understand that this process requires hand and wrist strength plus a lot of care when handling the pliers.
If you have been in this situation where you end up with a stuck lid, you know it can be frustrating to potentially waste your excess paint. So, to prevent this, you need to close the lid carefully as follows.
How to Close a Paint Can After Painting

Since paint is made with volatile organic products that can be harmful to your health, you need to keep all paint cans closed. Doing so ensures you and your family will not inhale the paint fumes.
But, before closing the paint can, it is best practice to wipe the rim with an old rag to remove any wet paint still left on the surface. Doing so will prevent the paint from drying after you close the lid, which would inevitably cause a very tight seal.
If you do not have an old rug, you can use a paper towel or a clean painting brush to wipe off the paint. When the rim is clean, here is how you can use a rubber mallet or hammer to re-seal the lid without damaging it.
Place the rid on top of the can. Ensure you align the lid so you can cover it easily.
Place an old rag on top of the old can (optional).
Use a rubber mallet to pound the lid back in place gently. When doing so, ensure you do not dent the rim, which would make it harder to open it in the future.
If you do not have a rubber mallet, you can also use a hammer to close the lid without damage. Here is how;
Place the lid on the lip of the can.
Place an old towel or rag over the lid.
Place a block of wood over the towel.
Use the hammer to gently pound the block of wood, which will return close the lid without causing dents or scratches.