You're undoubtedly wondering how to pack dishes for a move without losing any if you've ever lost a wine glass in transit. We've all been there where you go to your new house and unpack a pair of wine glasses for some celebratory drinks, only to discover that they've cracked on the trip.
As you complete your moving checklist and prepare to begin packing, here's what you need to know about packing dishes properly, so your dishes are intact at the end of the day.
How to Pack Dishes for a Move
1. Packing Supplies
- Packing tape
- Moving boxes
- Marker
- Packing paper/Bubble wrap/Foam pouches
2. Tape the Bottom of the Box
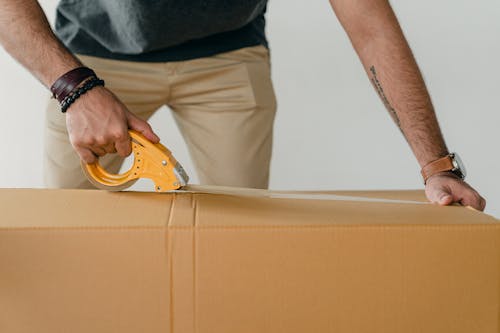
Taping the central seam of the box flaps isn't adequate. Instead, tape the flaps' seams a few times, then tape along the center of the box in the opposite direction to create a plus sign. Then tape the edges of those pieces of tape along the side of the box to make sure the bottom of the box doesn't open up when you take it up.
3. Make the Box Accessible
You'll need to be able to reach the bottom of a tall box. Tape down two neighboring flaps temporarily so you can get in there and work.
4. Add Padding
To build a cushion, roll up some packing paper and arrange a nice layer, approximately three or four inches, at the bottom of the moving box.
5. Plates and Bowls
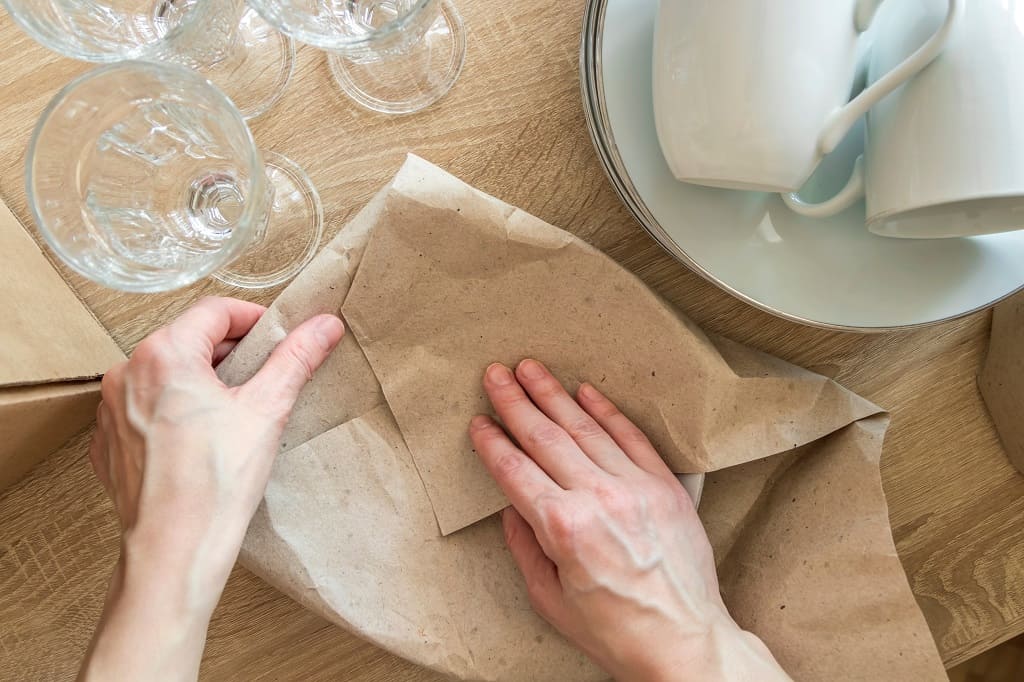
When packing bowls and plates, lay one or two sheets of packing paper flat on the ground. To pack the plate or bowl, place it at the edge of the dish wrapping paper and wrap it around it multiple times. Make sure the paper is crumpled up inside the opening for bowls. Tape the packing paper in place.
Instead of packing paper, you can use foam pouches to pack dishes. First, place the dish inside a partition once it has been suitably protected. Next, use foam peanuts or extra packing paper to fill in any gaps. Finally, use packing tape to close the box and secure it.
6. Cups and Mugs
We recommend using enough packing paper or bubble cushioning to pack cups and mugs. These protective layers can easily be molded around goods to protect both the inside and outside. Next, protect the cups or mugs by wrapping them in a layer of protective padding and taping them together.
Please place them in one of the dividers in the moving box. Additional cushioning should be placed around any empty spaces. Use packing tape to close the box and secure it.
7. Glasses and Stemware
Consider packing wine glasses and stemware with extreme caution because they are particularly breakable. To protect the glassware, you can use packing paper, bubble padding, foam pouches or a mix of these.
We recommend rolling the glass or stemware item in a layer of this protective wrap if using packing paper or bubble cushioning. Fill the inside gap with packing paper or bubble padding as you roll the glass or stemware piece.
Make sure the glassware is appropriately protected if you're utilizing foam pouches. You may need to double up. Instead of one foam pouch, use two. Fill unfilled areas with more cushioning and carefully insert the glass inside the box. Use packing tape to secure the package.
8. Fine China and Crystal
Because fine china and crystal are very costly, we recommend paying special attention to them. First, wrap and secure each item of china or crystal in numerous protective layers using packing paper, bubble wrap, foam pouches or a mix of these materials.
If you're using crystal glasses, make sure the insides are packed with paper and taped shut for extra protection. We recommend reusing the original packaging that the china and crystal arrived in for the move if you have them.
If the individual boxes are small, you might be able to put many of them into a single compact moving box. But what happens if you don't have the original packaging? Use a box and dish/glass divider set to keep each item separated. Use extra cushioning to fill any gaps, and the box should be taped shut.
9. Other Kitchen Appliances
Wrap the handles of larger items, such as pitchers, with packing paper before wrapping them individually. Wrap rolled-up paper all over the teapot's handle, then wrap more paper around the spout.
Place the teapot upside down at the bottom corner of the stack of packing paper, fold a few sheets over it, and tape it together. Wrap the teapot lid separately from the pot and place both in the same box. The teapot should remain upside down in the box.
Wrap each knife with paper before placing it in bubble wrap. Alternatively, please put the knives in knife-specific protective sleeves. Finally, label the bundles so you don't forget the sharp edges when unpacking.
Stack pots and pans in nesting groups of varying sizes. Line a large pan with two or three sheets of packing paper, then insert a smaller pan and line it with more packing paper. Place a smaller pan on top of it, and so on.
Wrap at least three additional sheets of packing paper around the nested pans. Before placing the bundle in a box lined with packing paper, secure it with a piece of tape.
10. Label All the Boxes
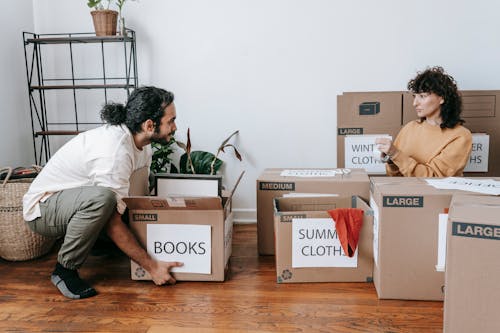
Are you done packing dishes? It's now time to label your containers. When you've finished packing dishes into each moving box, make a note of what's inside on the outside. We also recommend noting the location of the box.
"Kitchen" or "Dining Room," so movers know where to put the box at the new house. Make sure to include a "FRAGILE This Side Up" sticker. This way, movers will know to take extra care with these boxes and won't just put them in the back of a moving van at random.
11. Packing Your Box to the Brim
Fill the carton with your wrapped bundles until it's about three inches from the top. You'll need to add a layer of crumpled packing paper on top, as well as little non-breakables lightweight wooden or strong plastic trays.
Fill the top of the carton with paper so you can't depress or push down on the top of the packing box when you tape down the top flaps. Boxes are typically stacked several boxes high when loaded onto a moving truck. If your carton is not tightly packed, the subsequent compression can harm your contents.
Always label your boxes to make it easy for the movers to discharge them into the correct area or room. If you plan on moving again soon, flatten your dish barrels or packing boxes for recycling, as well as lay out and straighten all of the packing paper.
Bundle it up and store the packing material somewhere dry. Reusing packing materials can help you save money on moving charges if you anticipate relocating again soon, so the extra effort is well worth it.
Tips for Selecting Packing Materials
A dish pack box/ dish barrel is thicker and tougher cardboard to reduce travel shock and safeguard your dishes. Even though the name originated from wooden barrels used to export china overseas, moving companies have cardboard substitutes on hand. Dish boxes/dish packs are a little more expensive than standard moving boxes, but they are well worth it.
Properly pack and assemble the boxes and neatly tape the bottoms. Instead of masking or duct tape, use sturdy, broad packing tape. A tape gun or applicator will make this work easier, and they're simple to set up with a little practice.
Draw tape approximately a third of the way across the bottom and up the sides. The extra tape is essential to secure the ends of the container and keep it square while taping. Fragile items can be packed in newsprint, but each piece will need to be washed when unpacked. White packing paper is recommended and can be acquired in bulk from a moving company.
Prepare a stack of paper on a table, then have your carton ready to begin packing. Involve the entire family. If properly instructed, children as young as seven years old can assist in packing even fragile items. It makes them feel useful and needed.
In your dish barrel, start with a soft bed of paper. The first thing you should put in your packing carton is a soft bed of packing paper to cushion the box's contents during transportation.
Crumpled paper, not folded newsprint or paper, is the best. The crumpling helps to absorb more shock during the transition. You'll need about a six-inch bed of paper on the bottom of each box, so don't be hesitant about using it.

