If your electrical box is damaged or out of shape, it is time you consider remodeling it. It might not be safe to use an old fuse box. The process may be simple depending on the extent of damage or the parts you intend to remodel. In most cases, remodeling will cost you more if it is an entire replacement. This article will discuss electrical box remodel tips, ideas, and the cost of a makeover to make the process manageable.
When Should You Remodel Your Electric Box?
You should consider remodeling your electric box for the following reasons:
- If it has served you for more than 25 years.
- If your house is full of power strips.
- If you are considering adding more electrical additions that may need an extra power source.
- If you are adding new electrical systems to your current system.
- If you need more power than your current system.
- If your panel keeps tripping.
- If your lighting flickers
- If your electrical box is inside and you want to move it outside.
- If your current panel has less than 100-amp of power.
- If your electrical box has suffered physical damage.
Electrical Remodel Tips
When doing electrical remodel projects and upgrades, you may require tips and tricks to make the process easier and more manageable. Consider these tips if your old work electrical box is out of shape before seeking electrical remodeling professionals.
1. Confirm If You Really Need The Remodel
Because electrical wiring travels through many walls, check each room and internal wall. Make sure you can get to both sides of the wall. Check the walls on the opposite sides of a room if you wish to place an outlet, but only a few are nearby.
Cut a hole in this wall behind an outlet box to tap into the circuit if you discover a nearby light switch or outlet. Check carefully if the circuit breaker is on and where you wish to tap a new outlet. Adding extra outlets makes it possible to exceed the safe loading limit.
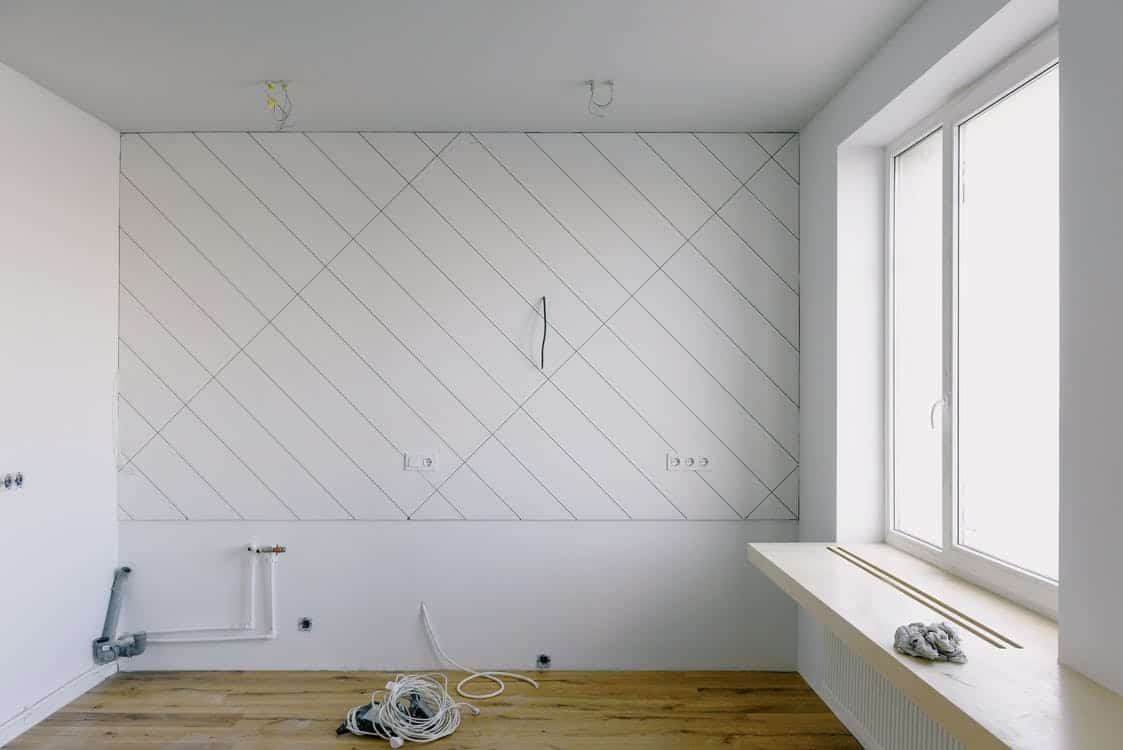
2. Move Your Ceiling Lights Without Using Extra Wiring
Sometimes it’s impossible to fit the ceiling lights where you want them. Remember that moving ceiling lights is simple and doesn’t need running new circuits or adding more cable. First, make sure your electrical lines have space for smooth movement by checking them.
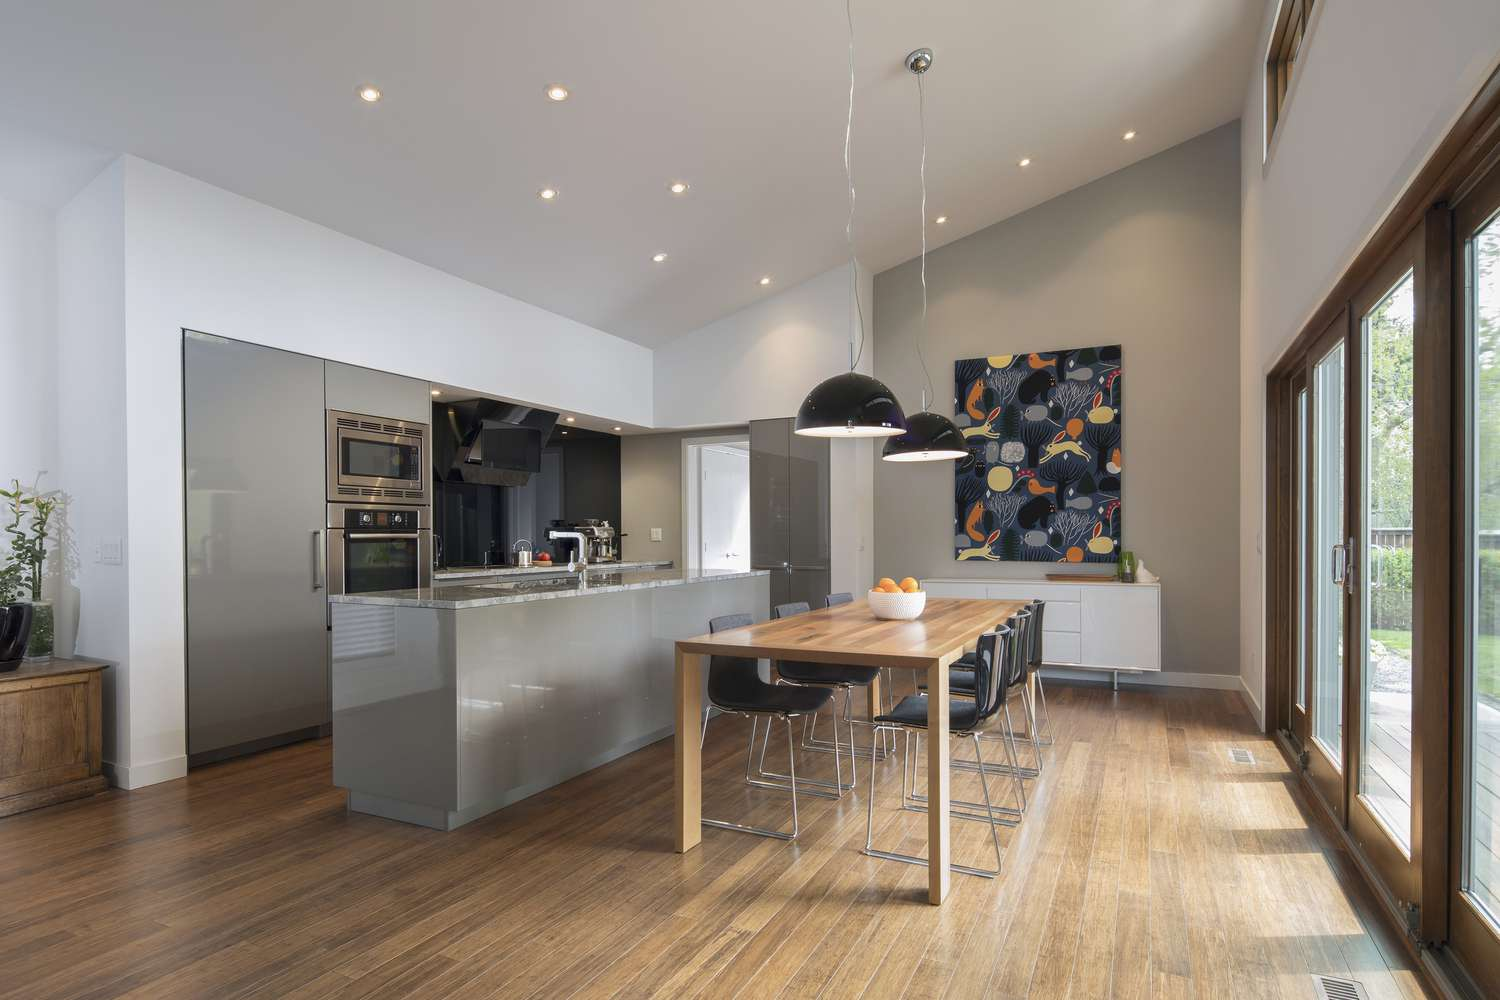
Image source: thespruce.com
Then, after repositioning your fixture, you can remove some of the staples you use to secure your electrical cable in the frame and re-fasten a cable with fresh staples.
3. Budget for the Extra Exam For Homeowners
After passing a certain test, amateur electrical work that is not authorized is feasible. You can add outlets even without a permit if you pass this exam. However, permission is required for the subpanel installation and new circuit. It would help if you had a permit to operate as a certified electrician.
After receiving clearance, homeowners are responsible for making their electrical improvements. To work as a professional, you must pay a nominal fee and prepare for the exam. 10 to 20 questions are on the test, usually in a permitting office.
After earning your certification, you may only pay a professional electrician. You can consult a specialist, such as Edmonton electrical contractors, if you wish to skip this exam.
4. Open up Old Boxes and Add More Fixtures
Since they are painted over, electrical boxes are simple to overlook. However, you must recognize these landscape features. It would be best to keep them covered because they carry live electricity.
It is important to remove existing boxes to add new fittings. Remove these covers and use non-contact voltage testers to check the wiring’s voltage. Wire insulation can be used in these experiments to find voltage. Make cautious not to touch any bare wire ends.
5. Inspect Your Old Electrical Boxes
Cutting into old boxes is referred to as remodeling or cut-in boxes. After selecting suitable ceiling drywall or walls, you can install old work electrical boxes. To fasten boxes, you could discover bending tabs or flip-up ears that tighten up against the drywall’s backside.
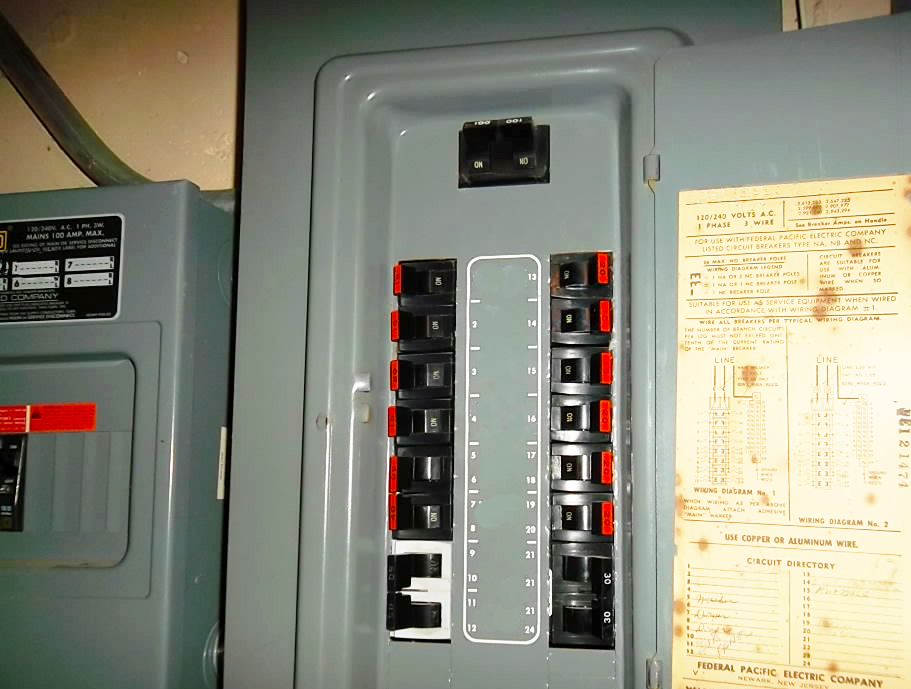
Image source: detailshomeinspections.com
If there’s no power to the outlet, you can cut a hole close to the box, enter an electrical line, tighten the box’s screws to pull the drywall’s tabs or ears into place or slide a box into the hole. By doing this, you may avoid fussing with drilling holes in the wall or ceiling to mount regular boxes against the framework.
6. Consider Re-wiring and Upgrading Your Switchboard
Upgrades are required for the electrical wiring and circuit board. Employ a professional electrician to assess and remove hazardous wiring in older homes. Run a new lighting circuit or add more power outlets to an existing electrical circuit. A professional may help you choose a new electrical box that suits your wall.
When installing a new switchboard, be sure to follow safety regulations. A qualified electrician may advise replacing your home’s circuit boards and electrical wiring, depending on its specific needs.
7. Include Building Maintenance
Building reports may reveal details like rotten wood on the facade boards. Your home’s outside is connected to the main electricity. You must check your house for maintenance concerns if it is over a few years old.
You may require a second-level electrician to repair the timber fascia. To handle repairs, a specialist can work to reconnect and disconnect your home’s main electricity.
8. Install Smoke Alarms
Hardwired smoke alarms with a power backup are required to inform family members of a fire. Smoke alarms that use batteries do not adhere to your state’s current construction codes and requirements. Battery removal may lead to hazardous situations. Hardwired smoke alarms may use batteries as a standby in the event of a power loss.
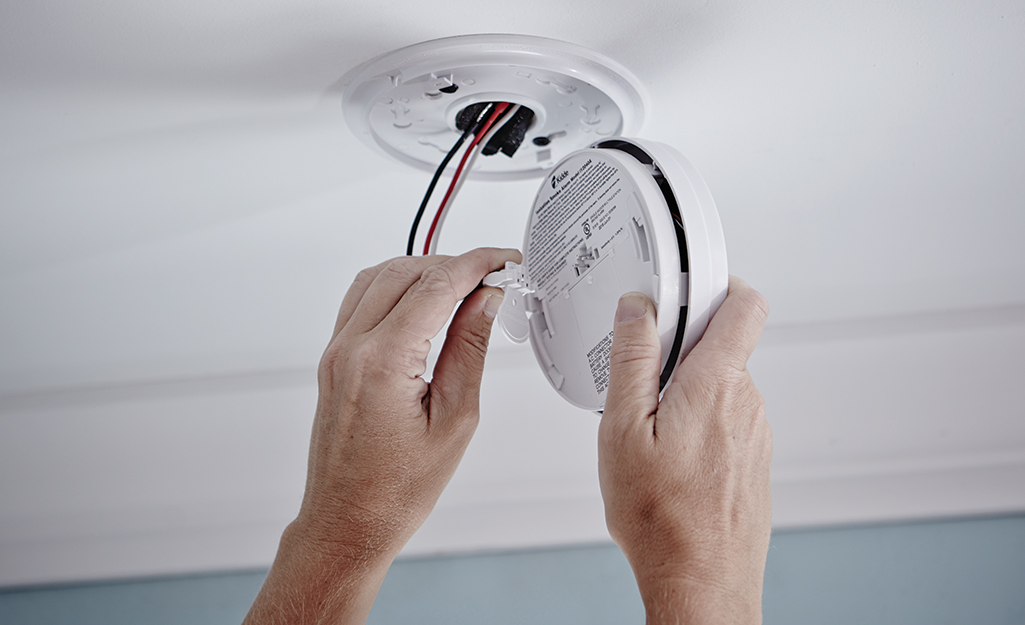
Image source: homedepot.com
The electrician can assist you in deciding where in your home to put an alarm for your protection. It’s important to replace outdated fans and lights with the newest fixtures if you want to improve the formation of your house. To alter the appearance of your home, pay close attention to the electrical in each room and the kitchen.
Electrical Box Remodel Ideas-Cover Your Electrical Panel
1. Using a Hang Note Roll
Before:

Image Credits: Pinterest
You can use artwork to cover an ugly electric panel, or if that is unavailable, you can buy a hanging note roll and hang it over the electrical panel. Hanging note rolls come in different sizes, and you can also purchase them as replacement paper rolls.
After:
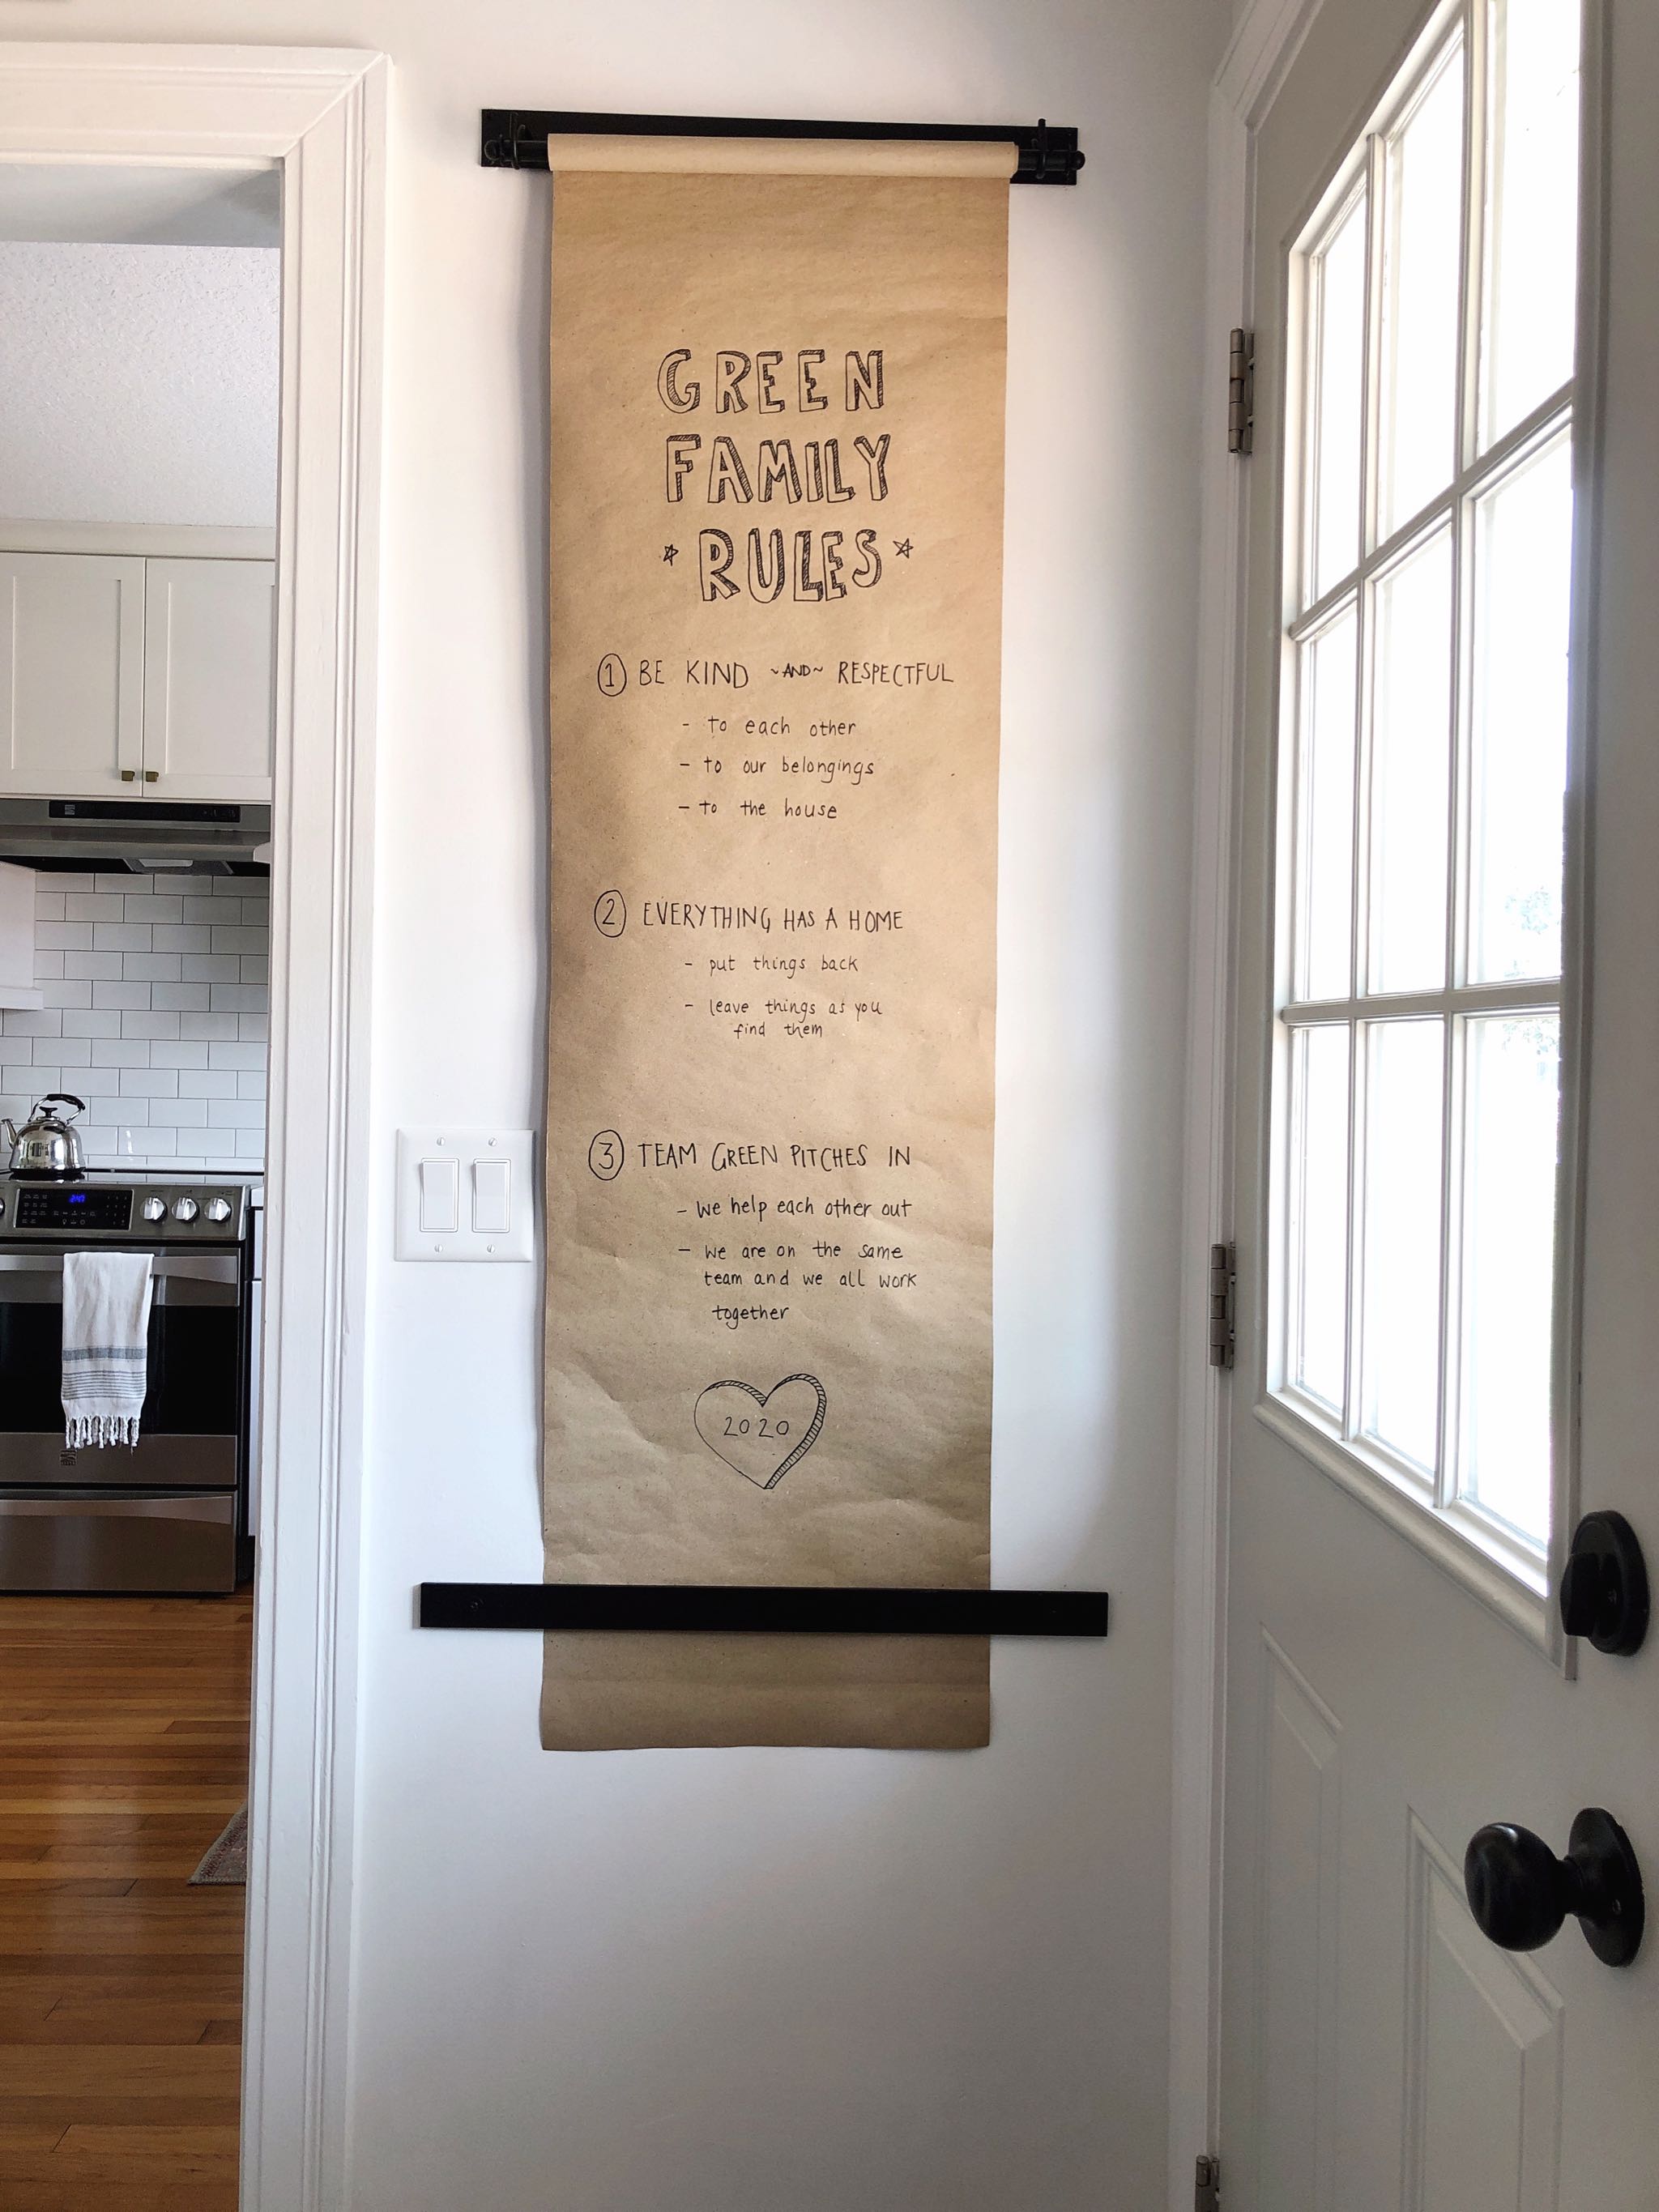
Image Credits: Pinterest
2. Using a Circuit Breaker Box Cover
An open circuit breaker box can make your walls look ugly. You can develop ideas to cover it and make it look invisible.
Before:

Image Credits: Pinterest
Your wall can be beautiful, but the circuit breaker box sitting in the middle can throw everything off. If your space is big enough, you can buy a big picture frame and attach it over the circuit breaker box to hide it.
After:

Image Credits: Pinterest
You can buy the picture frame or DIY a piece from your old wood piece. If you are going to make it yourself, you will need a 1 by 3 board chair rail, an MDF board sheet of a glass cutter and oil hinges, a handsaw, and a nail gun. Start by measuring your bracket box and add about 3 inches to the width and height to ensure the frame sits flat on the wall.
Remeasure the pieces to your liking and cut glass, paper, and the MDF board accordingly. Make a glass, paper, or MDF sandwich and nail them using the nail glue. . Patch up any gaps, then spray paint your frame and hang it on top of your circuit breaker box.
3. Using Artwork
If you have an ugly electrical box, you can cover it with a piece of artwork. Let’s say you have some canvas you can cut to fit the size of your electrical box and then let out your inner artist. You don’t need to be an artist to create beautiful patterns, but any structure you paint will come through to cover the panel. Check out the results.
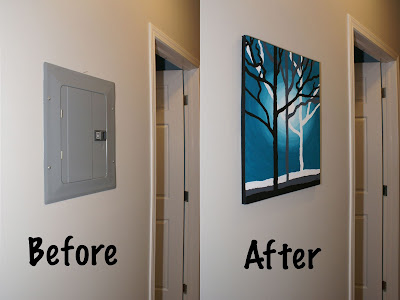
Image Credits: Pinterest
4. Using a Slat Wall Cover
You can explore two options when faced with an ugly electrical panel on your walls:
- Hide so that it blends with the room decor
- Transform it into a statement feature.
In this transformation, we are going to include both ideas.
Before:
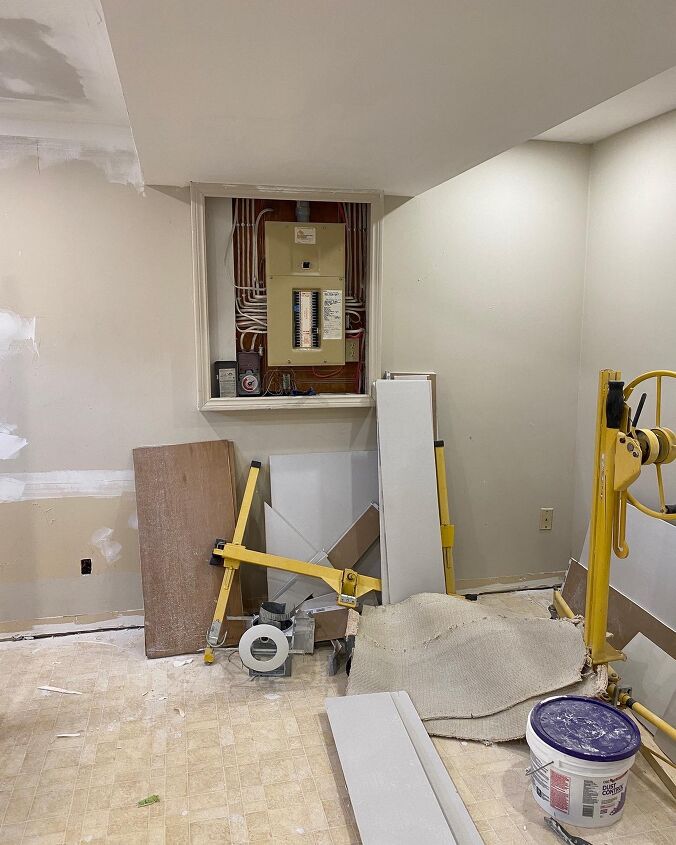
Image Credits: hometalk.com
The above image is the beginning of the transformation, the electrical panel was covered with sliding doors by the previous house owners. Here, we want to transform it into something stylish.
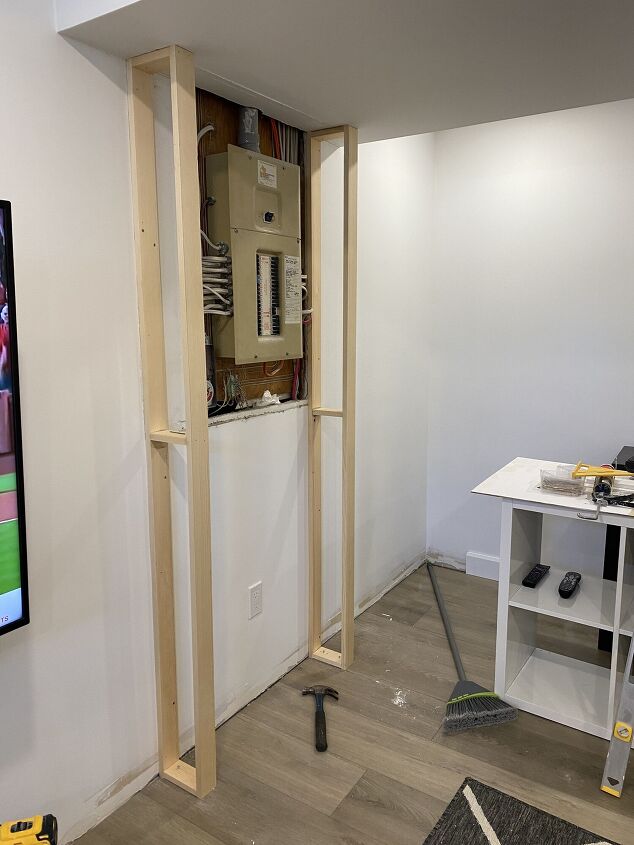
Image Credits: hometalk.com
The process is steady as we’ve built a floor-to-ceiling box with a full-height door. The door should resemble a very shallow closet. You should have a frame for this closet that should be 6 inches from the wall to clear the panel.
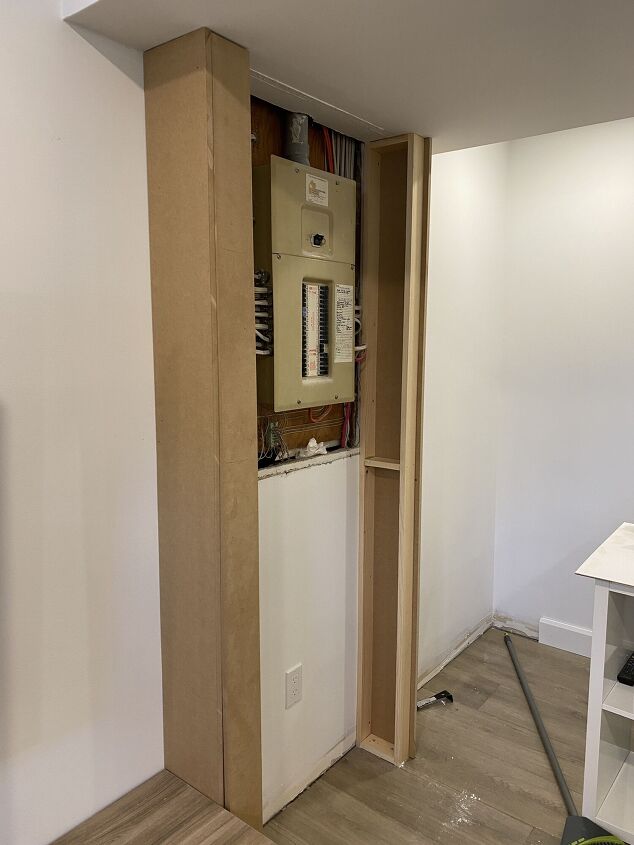
Image Credits: hometalk.com
Use MDF to cover the frames since you will add a slat wall after finishing the project.
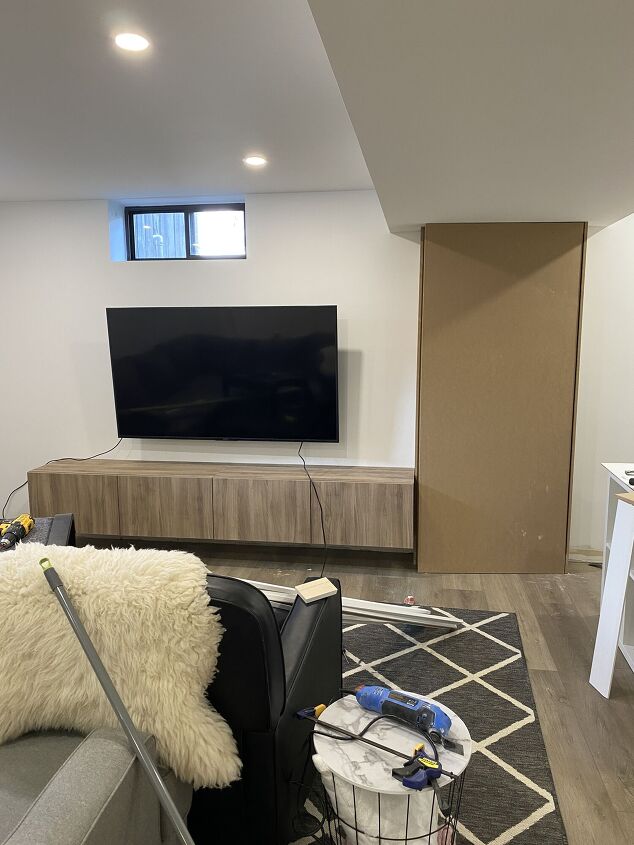
Image Credits: hometalk.com
Attach the door using a piano hinge and frame the closet using the MDF. You should play around with your wall spacing to ensure the slat wall fits in. In this case, you can use prime MDF 5/8in by 1.5in boards. You should put 1/2 in spaces between slats and use 24 pieces to trim and complete all sides of the feature.
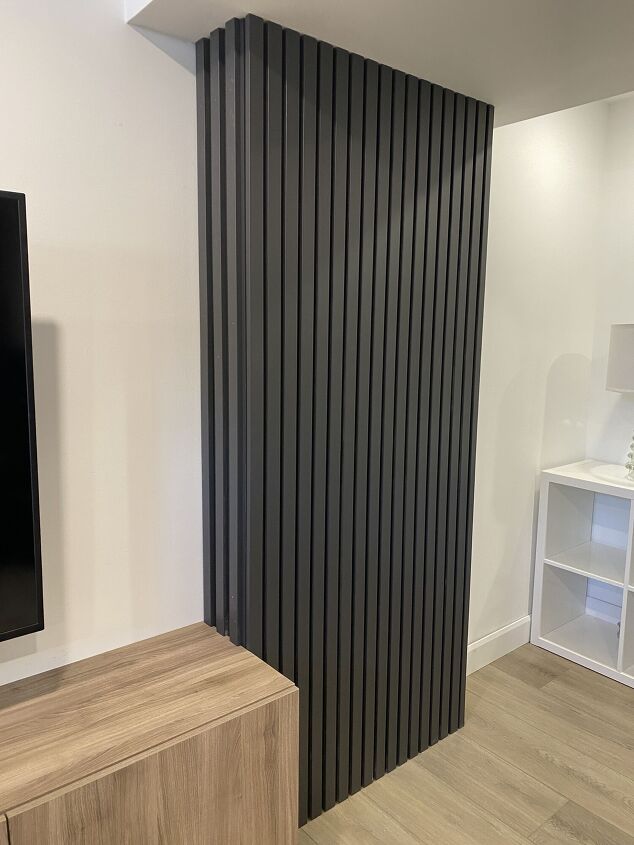
Image Credits: hometalk.com
Attach the slats using a nail gun; any inset any nails that are not flush. Fill in the holes using a wood filler and sand the feature using a palm sander.
After:
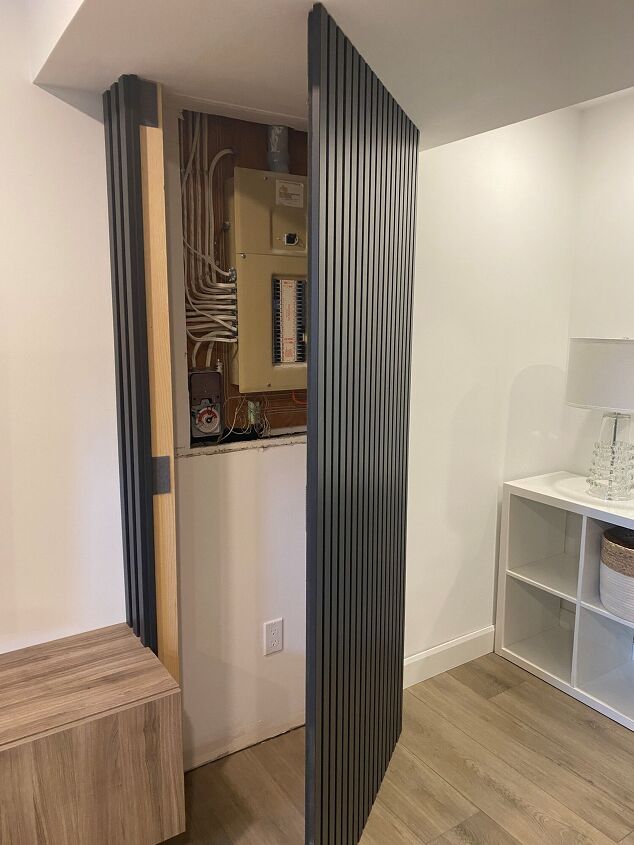
Image Credits: hometalk.com
5. Using Barn Door Closet
A big panel can make a wall look ugly, especially if it is exposed. You can cover the panel using a barn door closet. Get the right tools or hire a professional to install them for you. This is how you should expect the results to be:
Before:
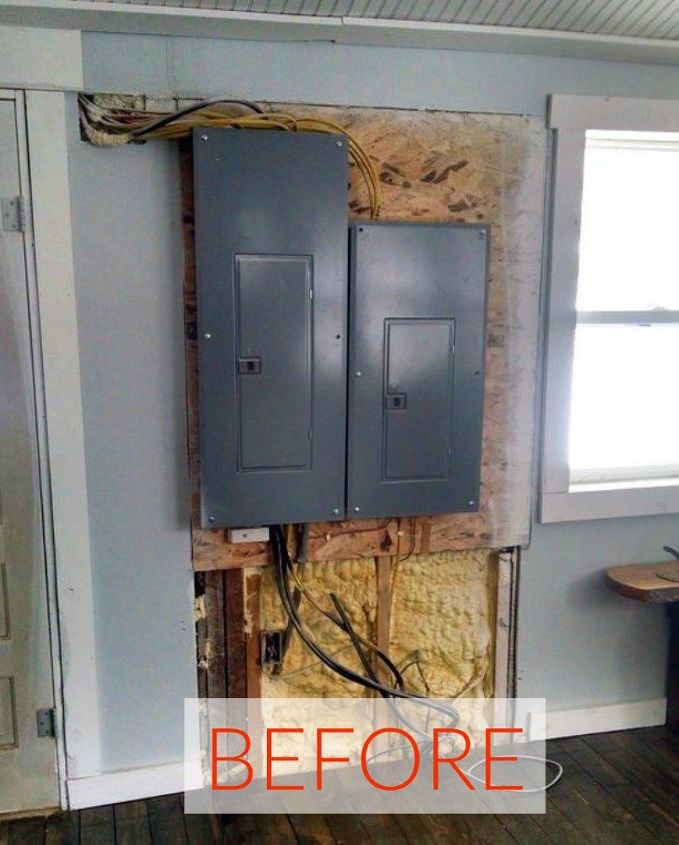
Image Credits: hometalk.com
After:
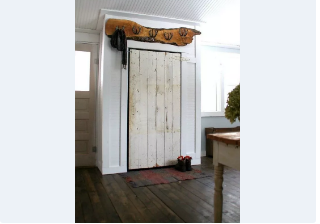
Image Credits: hometalk.com
Cost to Remodel Electrical Box
The average cost of upgrading an electrical panel is around $1222. However, most electrical panels are priced between $526 and $1998. It is cheaper to renovate most electric boxes since they service between 100 and 200 amps. However, some residential homes have higher amps, like 400-amp panels, which leads to price increases of between $1500 and $4000.
It will cost you less if you are doing an upgrade with the same amperage and using the same wiring. However, the price shoots when the remodelling includes added usage or modernization. A few factors influence the remodel and electrical box cost, which is why we have quoted the prices differently; let us look into these factors.
Factors That Influence Electrical Box Remodel Costs
1. Electrical Panel Amperage
It will cost you an average of between $500 to $4000 to do most electrical box remodel jobs non, including the price of hiring an electrician. An electrician can charge you between $50 and $100 per hour. Let’s say you are expected to pay between $200 and $3500 for the labour project if you want o upgrade to a 400-amp panel.
However, different amp upgrades quote their remodelling cost differently.
2. 100 Amp Upgrade
It will cost you $500 to $1500 to upgrade a 100-amp panel. The box is quite affordable, running from $100 to $200, but the labour takes most of the money.
In most cases, you will find that older homes run low amperage boxes since they did not consider modern electrical appliances when building them. However, if your home has a 60-amp unit, the renovation will be easier, especially if you want to add improvements like a workshop or a hot tub.
3. 150-Amp Upgrade
It will cost you between $500 and $1750 to upgrade a 150-amp electrical panel. The box alone costs around $150 to $250. Most average homes upgrade to a 150-am service, but if your home consumes a lot of electricity, you will have to upgrade to the 200-amp service.
4. 200 Amp Upgrade
It will cost you an average of between $750 and $2000 to upgrade your existing unit to a 200 amp service. The box alone will cost you around $250 to $350.
However, you may need to upgrade the amperage further if your home has hefty garage additions or uses hefty electrical equipment that needs extra amperage to support the extra power draw.
5. 400 Amp Upgrade
It will cost you an average of between $1500 to $4000 to upgrade your existing electrical box panel to a 400-amp service. The panel box only costs $500. The total cost is affected by the setup, and in most cases, an electrician will install 2-200 amp panels using one of them as a sub-panel.
In most cases, homes do not need this amount of power, but if you regularly use jetted tubs, this may be a great choice.
The Part of The Panel That Needs An Upgrade
The cost of upgrading an old work electrical box depends on a specific part that needs the upgrade. It will be expensive if you remodel the entire electric panel and cheaper if you remodel the parts. These parts include the Electrical panel, circuit breaker, subpanel, and fuse box.
1. Additional Upgrades
Some upgrades and changes during the installation process may affect the total cost of remodelling an electrical box. For instance, moving an electrical panel outside will cost you an average of between $1500 to $2500.
The price includes purchasing outdoor equipment and wiring to reach your desired location.
2. Additional Wiring
You must budget for the additional wiring if your remodelling project is going to be extensive. Installing electrical wiring or panels costs between $600 to $2300. The total cost is affected by what needs to be replaced. For instance, it could be old wiring, worn outlets, outdated fixtures, or damaged circuits.
Frequently Asked Questions
1. Can I DIY My Electrical Panel Myself
Handling electrical repairs is very dangerous, especially if you are unskilled. The disadvantage of replacing your electrical box is riskier. Hiring a professional to wire it correctly and do the right coding is advisable. Consider that improper grounding and handling of electrical wiring can result in electrocution.
You should hire a professional to pull proper permits, work with your local power supplier, and a person who knows the ins and outs of the current code and safety requirements. This will ensure you are safe from hazards and prevent expensive repairs in the future.
Featured Image Credits: power4ward.com